 8:31
American Audio CK-1000 MP3 demo. 1.
Contents of the video
0:00 I had this through the post a couple of hours ago
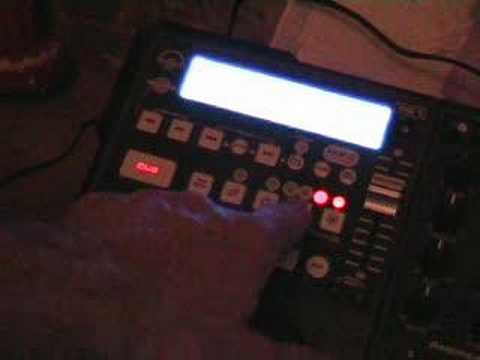
Alright folks, I had this through the post a couple of hours ago. It's known as the CK1000 MP3 player from American Audio. Now normally, I wouldn't do some sort of demonstration stroke tutorial this soon. The reason I'm actually doing this is because it's quite self-explanatory. In other words, you can theoretically take it out of the box and if you've got a tiny bit of knowledge on DJ equipment, you can near enough work it out without looking at the instruction manual. But, very important... I highly, highly, highly recommend you always look at the instruction manual. The reason being is because A, you may not use the piece of kit correctly. B, you could let's say just think, oh we don't need the instruction manual. Not for this but for any piece of kit. Plug it in, play and then six months down the line your mate will come around and say, didn't you realise that it actually did so and so? And you'll go, did he really?
Because you didn't look perhaps at page 23, section 7 and it said, guess what, you can do this with it as well. And you'll be thinking, I've had it for that long and I didn't realise. So, always look at the manual. Right, what I'll do, I'll pause the camera and we'll have a closer look at the knobbly bits. Hold tight. OK, there we go. So what I'll do now, I'll explain the one side and whatever I explain on this side will be basically a mirror image to that side. So, if we just pan a tiny bit closer to that area, we can get a general idea of all of the buttons. Right, quite self-explanatory. This is what I like about it. You know, you haven't got to have 7-0 levels in rocket science to work things out. Cue is basically cue the actual track. Play pause is just, you know, play the track. That's it. Search here, search through the track.
Track search, so you go 1, 2, 3, 4, 5, also plus 10. So instead of like if you've got a CD with 25 tracks on, instead of going 1, 2, 3, 4, 5 all the way to 25, you can hit that a couple of times and then you'll get there a lot quicker. MP3, folder search, time, so you can either have the time up, so 1, 2, 3, 4, 5. You can have the total amount of time that's left on the CD or a countdown timer, which is what all DJs like because we want to know how much time we've got left. Very important. Single or continual. In other words, press it so you get single and it will only play the one track and stop. Continual, it'll just go through the entire CD. Tap BPM here. So in other words, while you're tapping that, in line with the beat, press the beat.
2:40 This button here basically is key lock, so in other
It will actually give you the BPM of the track, but bearing in mind, only use that as a reference. That's very important. And also, if you want the precise BPM of that track, make sure that the pitch is dead centre and we have 0.0. If it's down there at the minus position, then guess what? You'll be getting the BPM, but you won't be getting the BPM of the proper track when it was made originally. That's very important. OK, what have we got? Press that button there and now the jog wheel can be used for scratching purposes, which is quite cool. This button here basically is key lock, so in other words what that means is wherever the actual pitch is you will have the original sound, the original key, the original tone of that particular track but
If you move the pitch to the minus position, the track will slow down. If you move the pitch to the plus position, the track will speed up. That's quite important. OK, seamless loop so we can loop the actual track as well. Bop. Now that's quite a nice feature. Have a listen. So in other words, what we can do is since we hit bop, it goes right back to the beginning of the track. OK, we've got pitch bend as well. Let's have a listen. So, minus and it slows down. Plus and guess what? It splits. Speeds up. Okay, 4, 8 and 16. So what we can do, we can have plus or minus 16 on the actual pitch. We can have plus or minus 4 or we can have plus or minus 8. That's quite cool. Alright, the centre area. Let's have a look at that. Okay, what have we got here? We have got bass, we have got mid and we've got treble. We can do minus 30 or plus 12.
Pretty sure that's dB, decibels. Gain for each individual channel. Cue mix, so when that is set to number one, it means that you will be able to listen to this side. When it's set to number two, you will be able to listen to this side. And when it's set halfway, guess what? You can listen to both of them. Cue level, that will be the level or the volume control for your headphones. Master, that is the master output. In other words, what that basically means... If the two channels are set like that, in other words, this one is higher than this one, however high or low you turn the master, this side here will always be louder than this side. In other words, the master volume will be the actual output coming out from both tracks. What else have we got? Microphone volume. Here as well we have CD1, a button here for this CD, CD2 for this CD. If we flick over...
5:32 Track track, start, input
We can have an external CD into here, we flick over here, we can have an external CD into here. If we flick the one on the right hand side to this centre position that then will enable this guy here to have audio into it. This is auxiliary in. It's a small mini jack so basically you can bung your iPod in there which is quite nice. Cue start, what that does is when that's set to on position if we just go say to another track here. Now what happens now is with cue start watch if I move that over there so it wasn't on them it was on the auxiliary so put it to CD2 which is that what that is basically the track will start automatically over to the side one and that's not on CD either there we go all right have a look yeah if i move the camera back bear in mind this is punk tv so this is how it should be real so put it this way
If you're very lazy, you can just set it to cue start and you can go from one to the other without even having to press start. So put on to cue as well. Also, centre there we've got something called relay. Now when that is shining, what that basically means is you can go to the bar and have a drink. I'll explain. This side is playing track 1, OK? So when the light is shining there on relay, what that means... You bung the crossfade in the centre, and then what happens, you have the first track playing here. As soon as this one finishes, you'll have this one play track 1, and then you'll have track 2, track 2, track 3, track 3, track 4, track 4, etc, etc. Right, what I'll do, I'll pause the camera and we'll have a look at the back of it, hold tight. OK, here we go. This area here will always be set for your country, so never mess around with that area, full stop.
There is your actual power input, on-off button here, this is your microphone input, the centre area is for a jack, the external around there, you can see that circle, that is for a Canon or XLR. Input, ok we have line 2, line 1, so you can input there to external CD players, DAC players, MP3, whatever you want to. Output, we have a master output that can go to your main PA. So you can record what you want to play really. A digital out, which is quite cool as well. And this, which is excellent, this is a balanced output. So you could basically use this on a fantastically loud PA system and not get any buzzing sound at all. Alright, there you go. This is video number one, and in video number one we're looking at the American Audio CK1000. It's a twin MP3 player. Practice and enjoy.
This transcript was produced automatically from the audio of the video and may contain mistakes.





