 7:21
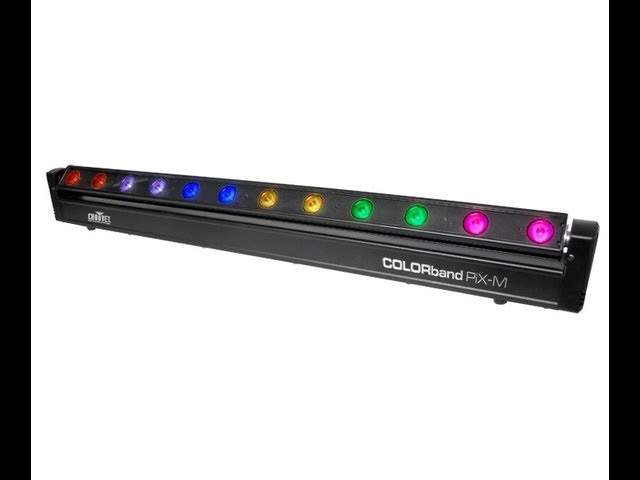
CHAUVET COLOURband PiX M LED Light suitable for The Mobile DJ, Night Club or Band
Contents of the video
0:00 M is short for Move
Alright guys, in this video we're looking at the Colorband Pix M. M is short for Move. I've got a reference guide there and very important, this here. This isn't just a little piece of paper to scribble and chuck away. This is your warranty card so fill all the details in. Don't forget to attach proof of purchase as well and this means that if anything does go wrong you'll get looked after. Alright, let's have a look at the Colorband Pix M. Right there she blows. First and foremost, I advise anyone who's going to buy the colour band picks to keep the box. If, of course, you're going to have a flight case then fair enough, but I advise you to keep the box because this is light with moving parts. So, first of all, size. The length is 104cm which is roughly 41 inches. And if I just move the light... Height-wise is around about 10cm.
2:02 Very nice feature here the centre
Which is around about four inches and then the depth is about six and a half centimeters which is two and a half inches right here we go from left to right power in dmx in dmx out dmx in and out this is three pin and this is five pin that there is to set the program's microphone for the input audio input if you're using sound to light C-O-L, just kidding, Calipan Pix M. And that's the power out so you can go in and then by using a male to female type kettle lead you can go to another Pix M or alternatively another light if you wish, a different kind of light. Make sure for crying out quiet it's nowhere near any people or public who could walk over it, on it or trip over it. Very nice feature here the centre. Each Colourpix comes with its own hanging bracket which is easily fitted like so and then these clips just twist and that locks in place. So in the box you get your Colourpix M, you get the foam inserts
Very important to keep these because these will make sure that the light stays in good condition while it's in the box. You get your bracket, instruction also known as instruction manual and you will get the relevant power supply for your country sticker and also this here, silica gel. Throw away, do not eat. Otherwise this could happen. If you can't afford flight cases, the best flight case you can have for the light you've got is the box that it comes in. So there we go. That is in its box and if I was to take this on the road now what I would do with this box is completely cover it in gaffer tape to make it a lot stronger. Alright, it's not going to be as good as a flight case but it's far better than having that light bouncing around the back of your van. Right, let's plug it in.
And they do its own thing, so there you go. Plug it in, you will find that it will have a bit of movement first before any lights come on. If you don't get any lights then it's more than likely because you haven't set the correct program. The noise you can hear as well is natural, that's just the motors moving this area here where the LED lights are.
4:03 You should be able to see on the readout there P2
Right, you should be able to see on the readout there P2. This is for a set program, this is program 2, and we can change that by going up or down. So for example we go from 14, 13, 12 all the way down to 1, back to 14. Now we're on P2 at the moment. Now let's say for example we wanted program 7, but... We didn't do anything else but go up or down. Now watch what happens after a few seconds. It should go back to the default which is P2. What we need to do is press enter. So, we'll carry on, we'll go up, 5, 6, 7 and then enter. You need to enter straight away. If you don't do that then it will go back to its original setting. So those are the programs. Inbuilt programs giving you a near enough complete light show. Right, at the moment we've got the Colorband Pix M on sound to light and we know that because you can press the menu and press it a few times until you get to SND but of course it's dependent on what program you've got prior to pressing it. You may only have to press it once or you may have to press it five or six times. Once you get to SND make sure you press
Enter. Very important, if you don't, like I said earlier, it'll go back to the last setting. We have minimum, maximum microphone there and sensitivity. If I turn that all the way to minimum and I press by the mic, it's not going to pick anything up because I've turned the microphone off. So, if I just turn that up very slightly now... It's just above the minimum setting. You'd set that to just above the minimum setting, let's say for example if you've got your colour band PIX-M very close to your speakers. If on the other hand you want to set this up the other side of the room but you still want it to pick up the sound from the speakers, you need to turn this dial more to maximum. We have C there on the readout, that's for static colours. Next one is T, it's for tilt. Next one is P, which is the auto programs.
And the next one is S, that's for the program speed. Just give you some of the specifications. Tilt is 270 degrees, light sources is 12 tricolour 3 watt LEDs, running at 50,000 hours. The beam angle is 20 degrees, the field angle 34 degrees, luminosity is 2321 lux, 2 metres, and the power link you can have 8 units. Check out the link in the description. It'll take you directly to the Chauvet site. And by all means, check out all the information there. I will be using this in quite a few gig logs, so check out more of my videos on YouTube. Ellaskins, practice and enjoy. Thank you.
This transcript was produced automatically from the audio of the video and may contain mistakes.





