 9:15
Kam DMX LED Starcurtain Demo video.
Contents of the video
0:00 You have before you the LED light curtain from Cam
Alright folks, you have before you the LED light curtain from Cam. I'll give you a few of the specifications first. The rated power is 15 watts. Light source, you've got a whole bunch of LEDs. You've got 24 red, 24 green, 24 blue and 24 yellow. Control, you can control it via DMX, it's sound activated and you've got program auto run. Also, takes 6 channels, 4 colour LEDs logically. The colour of the curtain, believe it or not, is black. Pretty obvious. And the size is 2 metres by 3 metres. Now at the moment all the LEDs are on. What I'm going to do, I've got my lovely assistant Ella. Say hello. Hello. She's going to help me dismantle it, OK? So there it is as it stands with all of the actual lights on. Now prior to dismantling it what I'm going to do is just give you a run down of what it can do. Hold tight.
I'm going to go over to the actual light control unit and I'm going to show you the different functions. By the way, this is just, at the moment, this is without the DMX controller. Right, we've got that all on, so in other words, when it's set to all on, guess what? Yep, all the lights are on. Now it's on sound, so if you can see while I'm talking, it's flashing. Basically, the way I'm talking is almost the equivalent of the beat of the music. I'm going to switch it over to auto now. And there you go. Also, you can change the actual speed as well, so if you watch, slow it down, speed it up. There you go. Now my lovely assistant, Ella, is going to help. Aren't you, Ella? Yep. OK, right, let's put the camera about there. And before we start dismantling it, we'd better turn it off, haven't we? So I'll just pause the camera, hold tight. Right, what we've got here,
On one side, which is basically the equivalent of sort of a tripod, a speaker tripod. And that has got an extension that you attach above that to a bracket and I'll show you that very shortly. Also then we've got three poles that will fit directly across and then exactly the same on the other side. So my assistant will now take away one of the Velco straps, okay? That's one, right. What we'll do now is we will get rid of them all, won't we sweetheart? And we'll do the top ones and then I'll show you the whole framework, whole type. So there's the actual tripod and if we look up we've got this sort of bracket here. This guy here will attach this piece to the bottom part of the tripod and then this one here attaches this part here. And if I undo that...
3:01 This is what happens, hold on
This is what happens, hold on. That will basically move down, if you can see, like so, up and down. And then if we have a look up there, what we can see there is a bracket. The bottom part there will keep this area on the pole, and then that top part basically secures the pole that moves across here. So I'm holding the actual camera as well so it's a bit awkward. And that's exactly the same all the way across to the other side over there. What I'm going to do now, I'm going to pull it apart and show you all the different bits. Right, here we are, my assistant's gone now. Well this is the pole that goes over the top. If you can see, you've got that piece of metal poking through there. Well let me show you. Press that in and then this pulls out.
4:37 Here we've got the actual tripod
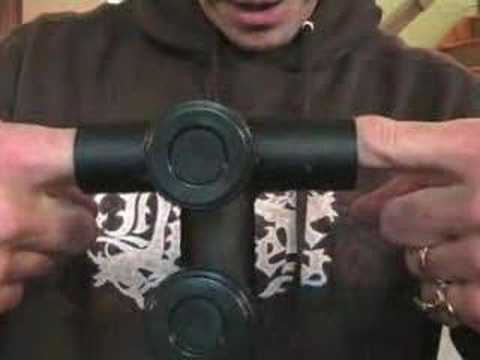
That's quite self-explanatory, and you don't need a vast amount of muscles to put that in, so it's literally a case of pressing down, pushing, and then that's it. So there's one of those two. That's it. So that top part is three poles. Then we've got this area here, comes out, and that's the top bit, so if you can see that. Here we've got the actual tripod. Only a small point, but that's how it should end up. If it ends up any other way, you'll find it probably won't end up actually in the bag. The worst thing in the world is to not tighten them at the end of the night and then one falls out and you've had it there, don't you? So that is one of the bases. Okay, light control unit. Very straightforward. I'll push those down. That is for DMX. In and out your basic Canon or known as XLR. And also here for people like me who just like to use 99% of the time stuff sound to light.
That's the microphone, that's the part that will actually pick up the sound. And then you've got here your selector, program select. So you can go all on, you can go sound, we can go auto, simple as that really. And here, actual speed control. That will increase and decrease the flashing of the lights. It is that simple. And then on the other end, actually attached to the curtain, you've got VAT. Now, be careful with that because to be quite honest it's the sort of thing that could sort of get in the way. So just pay attention to that and try not to tangle it up or anything like that. Right, I've got the curtain on the floor now so I'm going to fold it up and put it in its bag. Now then, one quick reminder here. If you've got bags or flight cases for any of your kit stick it in at the end of the night because there's nothing worse than just chucking it in and then you get home
7:06 Is that camera going down?
You think brilliant, you chuck it in the house and then you set it up for your next gig and guess what? It's knackered because someone's trodden on it or someone's spilt a cup of tea over it. So hold on a minute. So there you go. I've got it in its bag and that's it. Now my personal opinion about something like this, it's not for everybody. At the end of the day, if you don't want to spend the time putting it up, then maybe it's not for you. Or just maybe you don't like this kind of thing. One important factor, and this is a tip for anyone out there, who, by the way, is a mobile DJ. The first and most important thing you need to do when you get to the venue is set up the sound system. Why? Because lighting, you can mess around with that, you can put it anywhere and everywhere. Is that camera going down? Right. You know, the most important thing is the sound system because you need to have sound. As soon as you've got that on, then in a sense the people are happy because there's something happening.
So what I would recommend, highly recommend, is if you're going to invest in something like this, find a place where you're pretty sure it will be safe and you can put it, you can fit it up. Then, don't do anything, put your sound system up first. Make sure you've got that working and ready so the people are out there and they're listening to a bit of music. And then maybe put your other lights up. And then concentrate on putting something like this up. The reason being, like I said, is because it's going to take you... I mean, it took me around about, I suppose, maybe a quarter of an hour to set up 10 minutes. I would have thought over a period of time when you start to know exactly what to do, it's not that difficult. You're going to do it in a few minutes, but...
One, another important factor actually, like with anything in a sense. You know, it's so easy to walk into a place and just go bosh, bosh, bosh, you know, chuck a speaker over there, a light over there, put your smoke machine over there, press play and bang, everything goes wrong or people are falling over stuff. It is well worth spending maybe 10 minutes doing a recce, looking at the place, thinking about ideal places to put bits of kit. You never know, something like this Thank you for watching.
This transcript was produced automatically from the audio of the video and may contain mistakes.





