 22:51
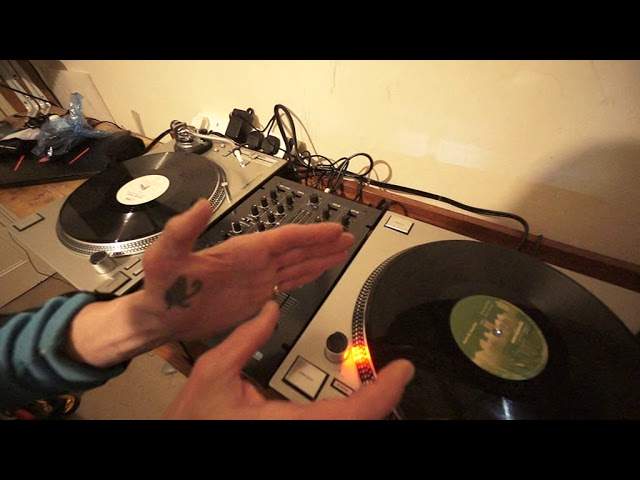
Overview of the Reloop RMX33I Mixer with the RP7000MK2 Vinyl Turntables
Contents of the video
0:00 This is my first look on the Reloop RMX 33i
Alright guys, this is my first look on the Reloop RMX 33i. It is a three, was it two or was it even four channel mixer? All should be revealed very soon. So, this mixer is very suitable for scratch turntablist, I will explain. Just going to take my jacket off. Also great for small to medium sized clubs and mobile as well. Now you may be thinking, mobile DJ? Well, guess what? It is suitable for a mobile DJ because you have the all-important microphone low and high EQ. Nothing worse than having a small mixer turning up and then thinking, oh dear, I've only got a tone control. So in this video, I'm not going to be pulling it up and showing the back because everything's plugged in. I don't really want to disturb any of the wires.
On the far right we have a mini jack auxiliary in, which is great for the likes of say an iPad or even an iPhone. So for example you know someone comes along and wants you to play their tune, you can play it. You can play from an iPad as well there if you want to. Next to that we have the microphone input which is XLR and quarter inch jack and then far left First, or far left yet, firstly we have the quarter inch jack for headphones, mini jack for headphones. Pretty much every single mixer now, modern day mixer, will have mini jack and quarter inch jack. Nothing worse than getting to the venue with your headphones, mini jack and its quarter inch. Oh dear, that doesn't happen anymore. Crossfade, really nice feel to it, very smooth and also the crossfade is...
2:34 Channel 2, where we get to the toggle switches
Changeable, so if you are a scratch turntablist that ruins your crossfade every five minutes, gone are the days of having to take all of the dials off and screw the top and take it off and realise you've then got to re-solder everything. No, it is pretty much unscrew, take out, or sorry, unscrew, lift, unplug, plug the new one back in, put it back in, the new crossfade back in and away you go. Far right hand side what we have here is we have channel 3 and we can select from line input or CD. Each of these channels from right over to left has low, has mid and high and gain control. Also, we have instant effects, which is a very nice feature and the effects are very bright, they're very prominent. They're not dull, they're not a bit like, oh dear, they spent a long time making this mix and they thought, let's just chuck a few effects in for good measure. No, a bit of time has been spent on the effects and the quality of the effects. So each of the three channels is pretty much exactly the same from the faders up...
Channel 2, where we get to the toggle switches. So channel 3, we can go from line, as I said, or CD. But when we go to channel 2, we can go phono, CD or iPad. So presumably there you can plug your iPad in and if you've got any kind of DJ program on your iPad, then of course you can use the iPad to mix and just use that one channel. So this is why I'm saying, is it one, two, three or four channels? Because if you plug an iPad in there, you could in a way have that channel number two as two channels if you've got two decks on your iPad, which is the same on channel one because you have Phono, CD and iPad. Because again, you can plug another iPad in there and you could mix again. So is that one, three, five, six?
God knows, but there's plenty anyway. Alright so right in the center here just below the LED readout we have the booth output so that's for monitoring purposes above there a nice dial for master and that's a nice smooth feel on that it doesn't feel sort of tight or rugged it's just got a nice smooth kind of feel in fact all of They're very tight. They feel robust. They don't feel as though they're going to fall off. They don't feel very plasticky. They also don't feel as though, you know, you've got the dial here and it's attached to something very thin that's just soldered to a very small piece of metal and it feels as though it's going to fall apart. No, I swear, I promise you, that is sturdy. It is solid.
4:49 We're going to do white noise
Okay, so what I'm going to do very quickly is I'm just going to put this needle on the record. Oh, there. And just give you an idea, I don't want to use too much audio, but that's the filter. Now we're going to do white noise. I do have, yeah, if that did seem to be quite loud, that's because I just noticed I had the gain quite high there. That's the reason. That's a bit better. Okay, we'll go now to the gate. So the actual effects is top right filter, top left white noise, bottom right gate, bottom left we have something called bit crush. So the gate, here we go. Now I do like the gate feature. So how can I explain that in an analogy? Let's imagine you do have a gate. The gate is closed. You're not going to let anything out. As you open the gate, you know...
The more you open it, the more can leave the field and go to the next field. So imagine a gate closed, loads of sheep here, they can't get out. Open the gate a little bit, one sheep can go out, a bit more too. I live in Wales, what else am I going to say? Dinosaurs? And the more you open it till eventually it's fully open, they can all go out. So in other words, at 12 o'clock with the gate engaged, that's the gate fully open, we're going to get... All of the sound. But now I'm going to slowly close the gate, have a listen. So now what we're getting is the 1-2, 1-2. So imagine doing some kind of a mix and what you want to do is slowly bring in one track into the other. But maybe there's too much melody going on. Well, using the gate feature, you know, you've just got that...
7:36 I use the effect, we have a small blue LED shining on that channel
I do like that effect. That's one of my best effects, but of course the best one of all time has to be the filter. It's got to be the best effect. So here we go. Let's just go back to the filter again. OK, there you go. That's the filter. And now I'm going to go to the bit crush. So again, put the dial to 12 o'clock and here we go. There you go. OK, and also if I just put the needle in the record when... I use the effect, we have a small blue LED shining on that channel. Now I think that's quite important, that's a good feature, very small but a great feature because what that means is that within a blink of an eye you can look and you can see, ah, we have the blue LED, that means that the dial for the effects is not at 12 o'clock so...
If you do have an effect engaged, you need to make sure you disengage that, otherwise you could get a little bit of an effect over a track that you didn't want to get on that track. Alright, so directly above the crossfade we have the crossfade reverse. Now when the crossfade reverse is on the off position that means that if the crossfade is on the right hand side you will hear the right deck, left hand side, left deck. When the crossfade reverse is on the on position it means that when the crossfade is on the right hand side you will hear the left deck And when the crossfade is on the left hand side, you will hear the right deck. Now I'm dyslexic and I got that right. That's amazing. Okay, on the left hand side we have two very small dials. We have CH fader and X fader. I'll explain what those are. Now the CH fader is for the channel fader. Now if you set that all the way
To the seven o'clock position, what will happen is you'll get a spike of sound pretty much as soon as you bring the fader up. And then when it reaches, I think it's around about sort of two and a half, three, you pretty much get the full volume all the way until you get to 10. So from three, four upwards, the volume will stay the same. Now I can demonstrate that now. So we'll turn that dial. All the way to the 7 o'clock position, put the needle on the record so the drum beat goes like this and just make sure we've got all that going. Have we got that on there? Oh, hold on, we're on phono, what am I doing wrong here? Oh yes, of course, I had the crossfade set to on. OK, right, a slight discrepancy there. Let's just rewind a little bit. I did say to 3 and 4.
Incorrect, it's actually to 1 and 2. So pretty much as soon as I bring that volume up we get the full volume of the track. So I'll demonstrate that again. Here we go. There. So you'll notice now, there, full volume all the way to 10. So pretty much from about 2 to 10 the volume stays the same. Now I'm going to turn that dial to the 12 o'clock position and let's see what we get now. So here we go.
10:56 From two, three, four up to ten, we have a steady increase in volume
Okay, so there we're practically getting no volume from about two or from zero to two, no volume. Then from two, three, four up to ten, we have a steady increase in volume. Now let's turn the dial all the way to five o'clock. Now what should happen now is we should get no volume at all until we get pretty much to the top and then the volume comes straight in. So here we go.
Okay, so why would you have that kind of feature? Now again I would say this mixer is definitely great for a scratch turntablist. Because very often what you'll find, I mean the old school turntablists when they used to do a bit of wicky-wicky and scratching, they'd be using the upfader. Simply because years ago you didn't have a crossfade, so that's what you used to do, upfader. But of course, if you wanted to snap that sound in, you had to be very quick with bringing the up-fader all the way to the top. But this mixer, you don't have to worry about that because depending on which side you set the channel fader curve means that if you want to, you can just flick the up-fader up a few, even less than a centimeter and the sound snaps in. Alternatively...
12:58 Literally from nine and a half to ten, that's when the sound snaps in
You can have the up-fader pretty much practically all the way to the top and no volume. And if your channel fader dial is set to the five o'clock position, then all you've got to do is move it up a little bit. So I can demonstrate both now. So let's demonstrate with the channel fader dial, the small dial set to the five o'clock position. Put the needle on the record and the up-fader is pretty much at seven, at eight now, eight and a half. Here we go. There, so from nine. So I would, that's amazing. Literally from nine and a half to ten, that's when the sound snaps in. So, for example, if I just grab a beat, you don't even have to use the up-fader that much, but again, I am by no means a good turntablist. That wasn't really a good demonstration, but at least it's proof in the pudding. It shows what it does. All right, let's turn the channel.
Up-fader, dial now through to the 7 o'clock position and let's repeat the process but this time I'm going to bring the up-fader all the way to the bottom and let's show you how stupid I am. Here we go. Of course if I turn that dial now, hold on, other hand, turn that dial now to the 5 o'clock and move the up-fader the same amount as I was moving it when the channel fader was at the 7 o'clock, we're not getting any sound at all. So again, a great feature for scratch turntablists. Each of the three channels has, of course, a cue button and when that's engaged it's highlighted with an amber LED. Oh yeah, also mustn't forget the crossfader curve. So when that's set to the seven o'clock position...
15:31 The right hand side coming in straight away
That basically means that when the crossfader is moved very slightly from one side to the other, so for example at the moment it's on the right hand side completely. So with the X-Fader small dial set to 7 o'clock and the crossfade set to the right hand side, if I now move the crossfade over very very slightly to the left hand side If I just bring the crossfade over very slightly, we can hear... The right hand side coming in straight away. Now, of course, that is a feature needed for scratch turntablers who, for example, like to do the crab move where you only want to move the crossfade very slightly to snap the sound in. You don't want to bring it all the way over and back, all the way over and back and so on. Alternatively, if you are more of...
A smooth house mixer, then you would start to turn that dial more to the five o'clock position which means you should by all rights have a gradual increase of the volume on one side and the same but the opposite a gradual decrease of the volume on the other side as you move the crossfade over so I'll demonstrate that now again here we go there okay there we go Alright, so above these two dials we have the cue level. That is for your headphones and then of course cue mix. Now... A small tip here. A couple of people have, in fact, probably two or three times a year I get a message saying the mixer isn't working, my headphones, I seem to be hearing the master volume all the time. And 99% of the time, in fact 100%, I don't think once I found out their mixer is broken, but yeah, 100% of the time it's because the cue mix dial
17:51 Just keep it at cue and over time hopefully it'll get better
Unbeknown to them, they've set that maybe at 12 o'clock or 1, 2, 3, 4, 5, even sometimes at say half 8 or 9 or 10 o'clock. Now what you need to do if you want to use your headphones for the purposes of listening to the track you want to listen to that you're cueing in and not the track that is playing, you need to always make sure that your Cue Mix dial is set. The DJ Tutor is available for purchase at Ellaskins.com. Try and keep that to the cue position because that means you're not going to be confused with, am I listening to the track I'm bringing in or am I also listening to the overall mix? Or am I listening to my next door neighbour complaining about the noise? Right, yeah. So just keep it at cue and over time hopefully it'll get better. The EQ curve for your... Where is it now? For...
For your microphone, now you have classic here which I believe is you can just increase or decrease. Kill on the other hand is to just completely kill the EQ. Now I'm not going to start this video again, I'm just going to make sure if that isn't 4 because I can find out something here as well. Yes it is, it's 4. I beg your pardon, this isn't... For, right, just rewind that slightly. I'm not going to redo this video. Okay, that is for the EQ for the channels. So we have classic here, which I presume is going to be minus so many dB and kill is to completely kill that part of the EQ. And again, that's probably a great feature for say house DJs. Also as well, I reckon... For scratch turntablists, so if you are a new scratch DJ or if you're an advanced scratch DJ, hopefully you will agree with me. If you're going to be doing a bit of scratching, maybe using an acapella or something like that, generally it's always a good idea to turn the bass down. If the bass is too high, you do get that rumble. So if anything, you want to maybe enhance the mid a bit, maybe keep the treble where it is, but of course if you have the kill feature, which you do...
20:36 Great little mixer, as I said at the beginning of the video
On the 33i all you do is you turn your bass all the way to the off position don't forget the off position on any mixer like this is at seven o'clock then you won't get any bass at all go to the classic and then you'll have a tiny bit of bass there so i don't know exactly how many uh minus db it is but you're gonna get a little bit in there So above that switch we have our low and high for our microphone, and above that we have the microphone volume. Also again, this is where it gets confusing about how many channels, because that can change to an auxiliary input. So there you go. Alright now, this is my first look at the Reloop RMX33i so far. Great little mixer, as I said at the beginning of the video. If this was in a small nightclub, wouldn't bat an eyelid. For a mobile DJ it does its job because you have plenty of channels and also you've got the must-have which is low and high EQ.
Bedroom DJ and of course scratch turntablists. Now I've also got a set of the Reloop RP-7000 Mark II turntables and some of you may be wondering why have I got them in different angles? Well, the right hand deck is more suited for your smooth mixing club house DJ whereas the left hand deck is more suited for your scratch turntablists. And of course the RP-7000 Mark II has the two start stops Two positions, of course you're wondering why have the start stop over on the left hand side. Well guess what? If I now turn this turntable, the one on the right, to the battle position then of course that start stop will be in this position here which means they're very close together and also in the battle position if I put the needle on the record here like so
Now I have complete control and movement over the entire part of this record here, whereas if let's say I have it in what I would class as, okay let's get posh here, the classic mode. Now the arm of the needle, the stylus itself is in... It's pretty much sort of in the way. So if I wanted to do some quick moves, it's very likely I might accidentally hit the arm of the turntable. But in the battle position, like so on the left-hand side, I've got free movement across the area there. Now I will put information in the description on the kit I've got in front of me once again. From ReLoop, this is the RMX33i and the Turntables Direct Drive, the RP7000 Mark II. Practice and enjoy. Thank you very much.
This transcript was produced automatically from the audio of the video and may contain mistakes.





