 19:57
Pioneer DJM 750 FULL features review with DJ Tutor
Contents of the video
0:00 We're looking at the Pioneer DJM 750
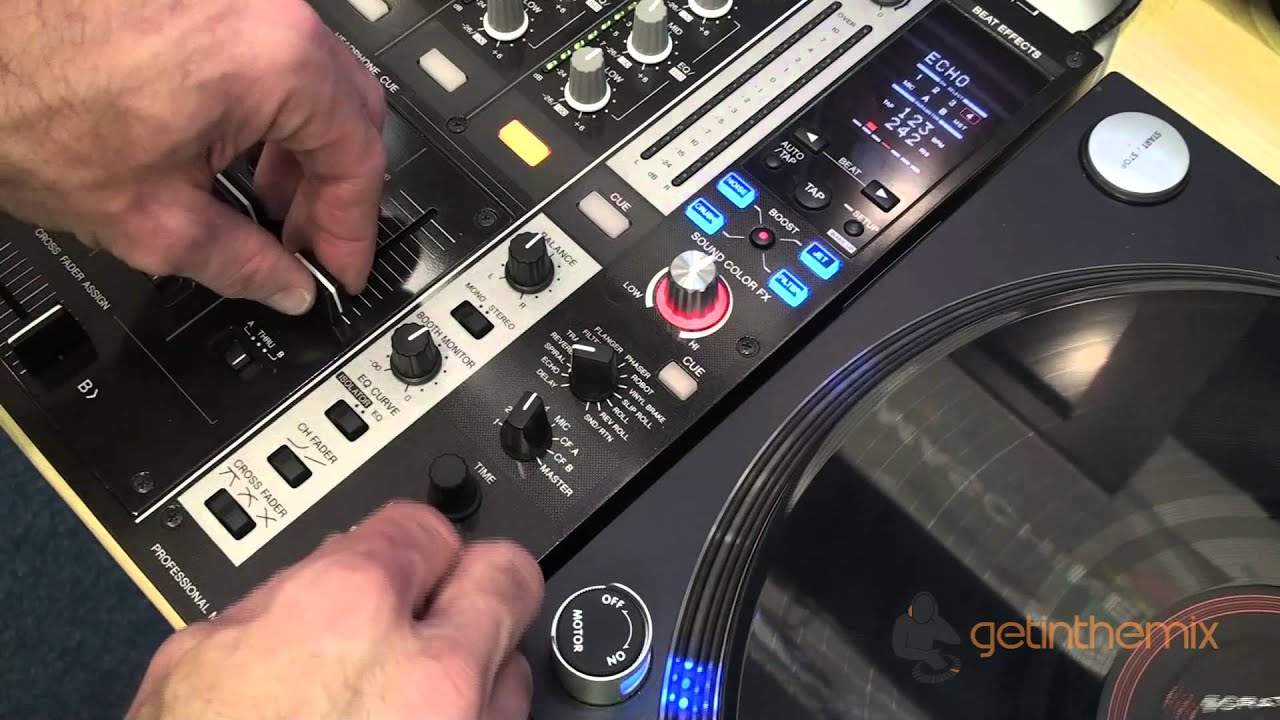
Alright ladies and gentlemen, we're looking at the Pioneer DJM 750. It's a four channel DJ mixer and can be used in many different ways. At the moment we've got it on scratch live with virtual vinyl but you can use your CDJs with it. Pretty much club standard. What they've got with this feature is something called the sound colour effects dial. So what we'll do... Put it on to crush, noise, jet and filter. You'll notice as well when the sound colour effects dial is set to 12 o'clock, none of the effects are engaged. You need to either move it anti-clockwise or clockwise. High, clockwise, low, anti-clockwise. Okay, Pioneer DJM 750, 4 channel, club standard mixer, The plate here, I don't know if you can see, you can actually take this away and put rotaries in here if you want to as well. Exactly the same footprint as the 800 and the 900. So for example, crossfade assigned, you can assign a crossfade using these switches here. Through position means crossfade is disengaged. B is right hand side, A is left hand side. And again, if you want to, you can have
All channels on side B, all the channels on side A, alternatively set to through and crossfade now is disengaged. Crossfader here, this switch, is to set the crossfade for example if you want to do different kinds of transitions using crossfade, for example set This switch here to the left hand side and this is great for cutting and scratching purposes. Beat middle, and the one on the right is more for beatmatching, beat mixing. Next one, channel fader here, set that to the left and this sets the curve of the up-fader so you can have a slow incline up to about 7 or 8, and after 7 or 8 then you've got quite a big incline in volume from 7 up to 10. Set it to right and you've got a steady increase in volume, smooth increase from 0 through to 10. Isolator for the EQ, very simple. Set to isolator and now you can have complete kill on the low, mid and high.
Switch this over to EQ and you've now reduced low, mid and high by 26 dB. Booth monitor here is for your own personal PA system. So for example let's say you've got from the output here into the main PA on the back of the 750 you have booth output. Then you can use this booth monitoring dial to set the volume for your own speakers. Mono and stereo switch and balance for the master out which is up here, top right hand side. This here will set the overall EQ going out to the main PA. Let's have a look at this one channel here on channel 4. If we press that button you can see that highlighted with an LED. That's for monitoring purposes using the headphones. So now if we had headphones in we could listen to that channel.
5:08 Low, mid and high
Even with the volume down, just so long as we've got the level here on your headphones set to anywhere after the 7 o'clock position. If it's actually on the 7 o'clock position, it's off, so you won't hear anything. You need to make sure you're either 8, 9, 10, all the way through till 5 o'clock. So, press play again. Low, mid and high. Trim, a lot of people wonder... What that's for? Well, that's actually for setting the volume for each channel. So for example you could be using say some pre-recorded CDs and they could be slightly set or recorded at a slightly different level to say your vinyl or another CD. So by using the trim what you can do is you can make sure each channel is running at the same volume so eventually then when you come in to a proper mix with
Both volumes on your up-faders set to the maximum, it means then that the output volume will be exactly the same through the master level output. Now above each channel we have CD line, phono and USB. And you'll notice top left hand side next to the microphone input, which is XLR or jack by the way, you've got your USB. Below there we have microphone level. We have high and low, three settings for the microphone. We have off, we have on or talk over. So when you set it to on, what you'll have to do, if you want to talk over the music, you will have to bring the volume down on the up-fader. You have to do that. Alternatively, if you set that then all the way to the right and talk over, what happens then is as you talk into the microphone,
7:32 Effect, dial, corresponding channel
Which means you don't have to bring the volume down, which also means then you've got spare hands to maybe grab your tin of beer. Below there we have MIDI on and off. We have fader start, channel 2 and channel 3. Headphones here, mono split or stereo. And this dial, which is situated bottom left hand side, is for headphone mixing. Now a lot of people always asking why is it that I can hear the other side coming through when I've got my headphones on. It could be possibly because this dial here is maybe at 12 o'clock or at 5 o'clock. What you need to do to make sure you only listen to the channel you want to listen to is set that dial, the mixing dial, to the cue position and then in turn increase or decrease the level dial for the volume
DJM750, let's check out some of the effects. We have delay, echo, spiral, reverb, trance, filter, flanger, phaser, robot, vinyl break, slip mode, roll, reverse roll and send and return there. That's for any external kind of effects unit. Time, level depth, channel select. Right, first of all, What you need to do, very important, is you need to make sure you've set this dial here to the corresponding channel you want the effect to be sent or used. So for example we're on channel 4 so got two choices we can either set this dial to channel 4 alternatively you can set it to master by setting it to master it means that if you're in the mix and you have two channels up The effect will be on both of those channels, so make sure if you want the effect on both channels set to master. If you don't want the effect on both channels just on the one channel, set this dial to the corresponding channel you want the effect to be on. So for this demonstration we're on channel 4, we'll set this channel selected to channel 4 and press play. Time dial
This is the amount of effect we will have, the time signature over the effect. And while I'm moving this you may notice up here we're changing the overall milliseconds of the effect. We can also change the amount of effect by pressing these beat buttons here. Also we can change the amount of effect by pressing the tap button. The quicker we press it, the faster the effect will be. Now if you've set all that correctly but you're still not getting any effect at all, it could be possibly because your level depth dial is set to minimum. I'm engaging the effect now, we're not hearing anything, because the level depth dial is set to minimum. If you have a listen as I start to increase this, you can start to hear the effect coming into play.
10:53 Echo, bring the volume down, up
I'd say the best position is at 12 o'clock. You're now listening to the delay and if I press one of these buttons, either side of the beat, to the right hand side, I can increase the delay. If I press the one to the left, I can decrease it. We'll go to echo, bring the volume down, up, down and we've got the remnants of that delay just slowly seeping out into the distance. Quick tip for you as well. If you want to get rid of the delay very quickly, engaged, volume down, level depth out, bang, it's gone. A lot of people think that by pressing the button here, bottom right hand side, to engage or disengage the effect, by pressing it to disengage it, it means that particular effect will disappear, it won't. You'll carry on getting that echo, so if you have a listen...
12:19 I'll give you a demonstration there
You've still got that effect in the background, so you will need to move the level depth to minimum to just get rid of the effects straight away. So I'll give you a demonstration there. Gone. Okay, that's your echo spiral. What I'm doing here now is I'm moving the level depth from the 12 o'clock to maximum to minimum. Again, sometimes less is more with effects. Also another idea with effects is we know all of that's set now for spiral. Sorry, reverb, beg your pardon. So what I can do now is move the level depth to around about the 3 o'clock position, and now I can engage and disengage by pressing this button in the bottom right hand corner. Just get a nice subtle effect. And at any time I want the effect to completely move away from the overall sound, just quickly turn the level depth to minimum. There. Very subtle difference but a big difference all the same.
You want to get that precise kind of effect over the sound. Okay, we're going to go for transform. Quite a good effect for bringing another track in over a track that's playing. So for example, let's say you do want to mix another track in, it may be slightly out of key. If you do just have the beat going on this particular track, it's a way of disguising another track coming in, say if it is slightly out of key. But again, just so long as you haven't got a lot of melody on the track that's playing.
15:01 Filter, probably one of the best and well-known effects
Okay, filter, probably one of the best and well-known effects. A more used kind of effect. Flanger and phaser. Robot. It's like we're lowering the overall sound. Again, what I'm doing here now, I'm moving the time dial. Final break. The beauty about Slip Roll is you don't need a loop But the underlying track is still playing. So when you engage the slip roll, you're starting at the point of the music where you start the slip roll and when you finish it, you're not going back to the point where you started it. You're actually starting at the point where the music is playing underlining... Right, cut that. Stop that again. Right, stop that bit again. Okay, slip roll.
Okay, the beauty about slip roll is when you engage it, you're forming a loop. Now normally when you form a loop, you start the loop and stop it, and then as soon as you stop it, you go back to the point where the loop started. The beauty about slip roll is you start, and when you stop, it will actually stop at the point where the music has carried on playing. That's one over one. We can get some good effects if we do say for example 1 eighth or 1 quarter of a beat.
18:00 These here are for grounding purposes if you're using vinyl turntables
Alright guys, we're looking at the back of the DJM from Pioneer. It's a DJM 750 and I'll give you an insight into what does what on here. You've got your power in, you've got your on off, you have return and send, the quarter inch jack that's for your external effects unit. We have phono CD line input these are RCA And you have those on channel 4, 3, 2 and 1. These here are for grounding purposes if you're using vinyl turntables. Outputs, we have XLR balanced, ideally for club installation, master output and record output, booth output here, digital master output Control here for Dextar 3 and 2, and your small hole there for locking the unit down.
This transcript was produced automatically from the audio of the video and may contain mistakes.





