 22:42
Pioneer WEGO2,VIRTUAL DJ Pro Using Xtendamix Videos Demo
Contents of the video
0:01 VirtualDJ, VirtualDJ Pro in fact, VirtualDJ
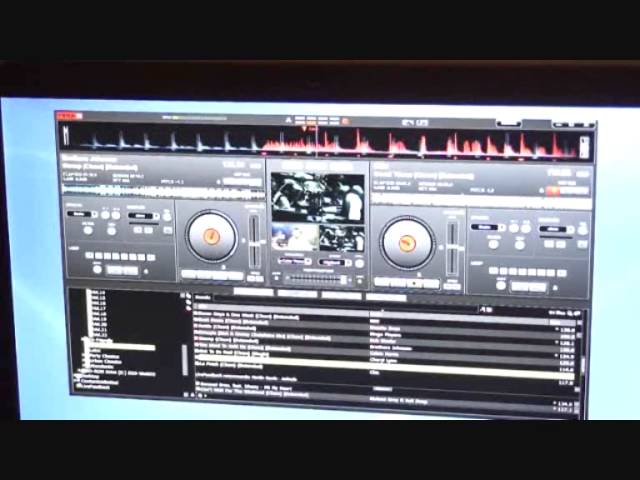
Alright ladies and gentlemen, doing a bit of a demo, stroke tutorial, stroke info on the we go to VirtualDJ, VirtualDJ Pro in fact, VirtualDJ Pro incorporating video. Lots of things going on here as well so I'll just give you an idea of what you're looking at. That's a white wall, there's a picture of some children, that there is an image of what you would expect to see with VirtualDJ Pro. That is the skin of the WeGo2, which is down there. It's a WeGo2 from Pioneer. That is my monitor. Lots of cables. There are some flight cases. That's an empty box of Maltesers. And that's a small little part of a tripod. Right, so let's have a close-up. Pioneer WeGo2, at the moment it's set up with VirtualDJ Pro and there is VirtualDJ Pro. Now, this particular program
The DJ Tutor is suited for anyone and everyone, but the Pro version you can do decent video mixing. When I say decent, you can video mix with the normal VirtualDJ, but what you'll find is you'll have a small box appear, a tiny box with the video image. And you can't get it any bigger. The only way of getting it bigger is to get the Pro version. So if you do want to do VJing, I highly recommend you do that. Just want to go over one problem that you may have and I overcame. If, let's say for example, you're in VirtualDJ Pro and you find the video is stuttering slightly. The actual image is shaking, it's not a smooth video. So go to Configure. And you need to go to video settings. And what I did, I just de-highlighted, I took away the tick from use hardware acceleration. As soon as I did that, it was perfect. You could see everything if I just go... Alright guys, going to be doing a few videos on... Alright guys, going to be doing a few videos on the WeGo2 from Pioneer. That's the red controller you can see in front of you.
2:47 You won't be able to enlarge that image
Comes in different colours, I just like the idea of having a mad sort of colour in your face. I'm using for this demonstration a program called Virtual DJ, it's the pro version that will enable me to do proper video mixing. If you get the normal Virtual DJ program you can still do video DJing but then you will only get a small box to see the video mixing. You won't be able to enlarge that image. To go on the road, say to put it onto a projector etc. So just to give you an idea of what you can see in the screen, that there to the bottom right hand side, that's my monitor so I can see what I'm doing. If I move that around you can see that moving as well. Above that we've got the monitor for the VirtualDJ. So that really is the sort of image the crowd would see.
The we go to from Pioneer is that red controller there. Above that is the laptop with the VirtualDJ Pro software. So what I'm going to do now is just go to the VirtualDJ software. I just want to give you a bit of advice, just in case you have a pitfall that I had where you've got the video image, it's sort of juddering, it's not moving smoothly. So I'll just pause the camera. Right, so what you need to do is go to configure. And you'll see we're highlighted video. Now there's a small box here and it's use hardware acceleration. What I had to do was de-highlight that, just take away the tick. And what that did for me is it stopped the actual video image from shuddering. You know, not running smoothly. So again, very sorry, I beg your pardon, I should have finished that off. So once you have unhighlighted that box, you always need to make sure that you apply. In this case, you click OK. Once you've clicked OK, then you can close that box off. There you go. What's quite important as well, well it's not quite important, it's exceedingly important. If you do want to use VirtualDJ Pro
5:30 Change display settings so you can
On the road, so you can use the video, you will need to make sure that you configure your laptop or your PC so you can have two screens. And you'll need to do that by going into the settings of the laptop or the PC, whatever you're using, and then you need to make sure that you configure it so you can add another screen. If you don't do that, then what you'll find is your laptop, you'll have a small box and you won't be able to drag... That image over to another screen. So do that by going to settings, go to change display settings so you can see I've now got two screens and again like with the VirtualDJ you need to make sure that the PC identifies the fact that you've got another screen. There's no point it... alright yeah I'll start again. It may identify it but then you need to make sure that
It keeps on identifying it and you do that by of course agreeing or okaying. If you cancel, it won't identify it. If the screen here says oh there's two there and then you just cross it off and you go up here to cancel, then you still won't be able to find that screen. You need to make sure that you have said look it's here so you need to make sure you click okay. A lot of people fall foul of that. But then they have to be told to do something. They may know what to do, but you've got to say, yes, you've got to do this. Very important. So pretty much once you've done that, then you can drag then the image to the other screen. It could be quite small, it could be quite large. So what you will have to do then is of course enlarge it, get it bigger or big enough for the screen you've got. And one way of doing that is just to go to the side of it.
And like so. I mean, again, you know, there could be other ways of doing it, but this is the way I'm doing it because I'm numpty. Right, there you go. So pretty much done there. OK, I'm going to be using a tiny bit of a track by Brothers Johnson, a track entitled Stomp. Now, on hearing, I mean, I've heard this track thousands and thousands of times. I absolutely love it. But maybe you're a bit of a train spotter here. A tiny fragment of the beginning of this track.
8:31 Again, these videos are about giving information
Again, these videos are about giving information. The videos I'm using are from a company called Extendermix.eu and I will put a link in the description of this video. If you are a VDJ, or you're considering becoming one, then just go and check them out. Looking at the centre of the Virtual DJ programme, you can change how you have the transition of the video. Can you change the transition of the music by maybe EQing slightly bass, mid, treble, faders up and down, utilizing the crossfades. You can also change the transition of the video as well. So we can do that by going to transition and we've got all these different ways of changing it. You can also change in which way, sorry, you want the key.
9:33 The two tracks you heard was Brothers Johnson's Stomp and Bingo Player
To be shown, and the key is the tone, the sound, the feel of the track. At the moment this one's at CM, which is C major, but then if we highlight that with the mouse and we press it again, we get to A5, which is associated with the Camelot wheel. Try and do a random kind of thing here. Pretty random. So the two tracks you heard was Brothers Johnson's Stomp and Bingo Player's Rattle. It's the clean extended. Mix. Mind you, you only heard a little bit of it as well. Alright, centre of the WeGo at the top we have probably one of the most important dials on the whole unit which is to browse through your files so while I'm doing that we're actually browsing through the files and you can sort of press down if you want to and load left or right
So, for example, we've got that file there and I can just load the other one on the other side and put that across there. Sorry, wrong one. There you go. Very simple. The track we've got on now is Chic the Freak. Now, on the odd occasion... You may find that the file you've got on there may not start at the exact point you want it to start at. So, it's up to you then to move the jog wheel and just cue. I don't know if you can see this small, light, tiny little red triangle there. And as I move the jog wheel, what I'm doing now is I'm pressing the cue button on the WeGo2 and you'll notice that that small triangle He is moving at the point where that first line is, and the line is there. So that now is my first cue point. But you can hear that's off. Really I want that to start at the beginning. So, that's right at the beginning of the track. Like I've said in quite a few videos in the past, not all dance music will start at the count of one. Quite a few tracks...
13:06 Keys, track playing, bring
Maybe start a tiny bit before, maybe you've got a tiny bit of an intro, it could be a bit of a vocal, it could be some sort of tone, some kind of melody. So what I'd probably do if I wanted to start this particular track in time, be about there. 3, 4, 1, 2, 3, 4, 1, 2, 3, 4, 1, 2, 3, 4 and so on. For everyone out there who likes to mix in key, and to be quite honest, it's pretty much a must. The only time you can almost get away with mixing out of key is if the track you're playing, or the track you're going to bring into the one you're playing, is, for example, it's not in a good key that will work with the track that's playing. The only way of being able to mix these two together is for the track that's playing to stop.
And you have some form of gap, and then you bring the other one in. And if you're a mobile DJ, the easiest and the best way of doing something like that is as soon as the music stops, go on the microphone, talk a little bit, and then bring the next one in. So, Chic Good Times is 8A, and if we highlight over that, we'll see that that is A major. So, we'll go back to 8A, and let's try and find something that will mix in key to sheet good times. Okay, for this demonstration what I've got is a Fatback Band track that I found loving. It's a clean single version and this is in the key of 9a. Now rule of thumb here is if you want to have a good smooth transition and keep near enough exactly the same flow of music
It's always a good idea to mix the same key with the same key. If you want to maybe lift the vibe, the feel of the whole room it's a good idea to go up one key. Alternatively if you want what's called pretty much like a step, a jump then go up two keys but you've got to be a little bit more careful about the transition because if there's a lot of music involved if you're going up Too many keys, you could fall into the trap of having a bit of a clash. Now not all keys work with all keys. It's best to go on the web and have a look at sites where there is the Camelot wheel and they'll be able to, the sites will be able to show you which keys will work with which, which won't work with other keys etc but quite often it's down to your ear.
15:26 It's got the same vibe, the same feel
If you've got a good musical ear, you won't have to look at the A1, A2, A3. You'll be able to listen to a certain part of the track and think, yeah, it'll work or it won't work. It's got the same vibe, the same feel. I nearly said veal then. Same sort of continuity. So what we'll do, we'll play Chic. I'm just going to go forward a little bit. Again, this is a very random video, so I apologise. OK, a bit of a rough mix. But you see, hopefully you get the idea there. OK, and there it is on the video as well. Right, one important part about any software really, but I'll show you on VirtualDJ Pro, is how to configure it to the piece of hardware you've got. Or also just how to run through basic configuration. And first and foremost will be the most important bit, which is sound setup.
Dip this slightly, that's better, so we can see what we're doing. Alright, now here we have already there, we have the Pioneer DDJ Wego 2. Now I've already mapped, not all of it, but quite a bit of the Pioneer DJM900 Nexus and you can see that highlighted there. So if I was to use that mixer, I'd have to make sure that... I've applied that. Now again, it's all well and good doing that and then clicking the X at the top there. But that's not going to do anything. I always need to make sure I apply. If I don't apply like I said earlier, then the program isn't going to recognize the fact that I'm using the Nexus. But I don't want to use the Nexus, I'm using the WeGo 2. So we'll make sure we've still got the WeGo 2.
18:08 We can do that by pressing the auto loop
I haven't changed anything, so I could just cross that out. And again, this is really important because some people will think, oh, I've gone to another, I've gone to, like we've done here, I've gone to the Nexus, I've clicked there, oh my goodness, it's going to be the Nexus. It isn't until you actually apply. So we can just close that off and it's still working. Alright, so let's pause the camera. All right, back at the WeGo2. What I'm going to do now, by the way, the track I'm using now is Double 99, a track entitled Rip Groove. And let's just form a loop. We can do that by pressing the auto loop. So just press this. So we've got a loop going on. I'm now going to press the CTRL-A FX1. So what it's doing now is actually cutting up that loop. And not only will it cut up the loop automatically,
20:03 You'll notice side of the laptop I've got the power cable going in the
The audio, it'll actually cut up the video as well. Okay, I've got the jog effects disengaged now. If we touch the touch-sensitive platter, pretty much do scratch mode. And whatever's happening to the audio is happening to the video as well. But when we engage jog effects... Now listen. We can now use the platter to change speed... Well, key, sorry, beg your pardon. CTRL-A off again and you'll go back to the original tone and feel of the track. Now again, this particular video is very random, there's a lot going on but I suppose I should practice what I preach but then again this isn't a gig. Now you'll notice side of the laptop I've got the power cable going in there. Now of course I've got that for a reason because I need to power up the laptop but his...
A bit of advice for you. If you're going to be using your laptop for quite a considerable time at a gig, maybe three or four hours, now don't take this as something that you have to do. If you do it, make damn sure the power cable is secure and can't be removed. But I personally would take out from the back of the laptop the battery. Why? The reason is, is that when you've got the power plugged in for three or four hours, probably after about half an hour or an hour, the battery will be fully charged. And what happens is if you've got that power cable plugged in all of the time, the battery starts to think because they've got blinking minds of their own now. They've literally got computers inside batteries. It's amazing. But the battery will start to think that it's charged and charged and eventually...
Over a period of time, the battery will not hold a decent charge. So just a little bit of advice if you are going to use a laptop. And tell me if I'm right or wrong. I'm pretty sure I'm right here. If you're going to use a laptop for three or four hours continually at a gig, take the battery out, have it plugged in. Make sure, of course, by God, make sure it's completely secure. It won't come out because if it does come out, it's going to stop working. But what will happen, it will... Lengthen the life of your battery, so just a small point there. Right, I'm going to class this pretty much a random video on the DDJ Wego Mark II. You'll notice the difference with the Mark II as opposed to the Mark I is you do have this extra plastic piece that you can attach to the Wego II and that will enable you to put your, say for example, your iPhone, more importantly I suppose really, the likes of your iPad.
This is fully compatible with the DJ app as well and also there is other software where you can start to form some fantastic effects etc. And I'll go into that in greater detail in future videos. So I hope it's been a help and by all means post any comments and I'll finish off with practice and enjoy. Thank you.
This transcript was produced automatically from the audio of the video and may contain mistakes.





