 17:49
Reloop Terminal Mix 2 With Serato DJ Intro
Contents of the video
0:00 Basic overview, demonstration stroke tutorial on this Terminal Mix 2 f
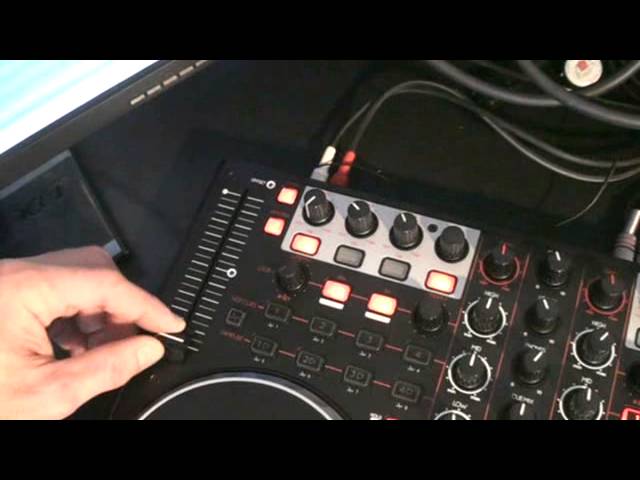
Alright guys, basic overview, demonstration stroke tutorial on this Terminal Mix 2 from Reeloop. It's a 2-deck Serato Performance Controller. Comes with software which is Serato DJ Intro. Also you get this nice piece of card with an overview of the functions on the unit. You also get a USB cable and you get your destructions or also known as instruction manual. Comes in Deutsch which is German. English, which is English, Francais, which is French, and Español, which is Spanish. So, nice one. Alright, there it is. You'll notice as well I've got a vinyl turntable to the right of the unit. You can plug in one separate entity, which is either vinyl or CD. And at the end of the video, I'll show you how to plug in and what to do. Alright, so, comes with Serato DJ Intro if you're using a PC.
You may have to put into your PC the drivers. I believe the drivers are on the software and I'm pretty sure if you're using Mac you won't have to do anything with drivers. So what we'll do, we'll look mainly at, first of all below the platter, the three buttons from right and it's on both platters from right through to left. We have play pause. We have a circle with a line, which is sort of cue, and we have this thing that's got a cup on it. Don't ask me why it's got a cup, but there you go, it looks funky. Alright, first and foremost, this is my own personal opinion about this particular unit, it's very sturdy. The platters are exceedingly sturdy, they're not flimsy, they're not wobbly in any way. Yes, admittedly, if you put your finger either side of the platter and really pressed hard, they'd move, but then you're not going to do that.
2:23 Moves, bring it back to that point
From the point of view of a DJ, a turntablist, really giving it some welly, it's not going anywhere. And also what I do like is if we take the sound, right, that sound, you'll notice my finger is there and scratch turntablists will understand this and hopefully you will as well if I try and explain it as precisely and concisely as possible. Where my finger is now, that's roughly half past eight. You'll notice I'm scratching that sound That's half past eight, you know we get it that's not all right yeah that's nine o'clock that's half past eight and the sound isn't moving it's not I'm not having to follow that sound now some CD players with scratch mode, maybe some controllers as well. You do tend to start to have to try and catch up with the sound. You shouldn't have to. If that's where you're scratching that sound, whatever the sound is, that's where you should have to only scratch the sound. In other words, when it moves, you want to bring it back to that point. Moves, bring it back to that point. You don't have to move and then, oh, try and find the damn thing again. So, scratching, very good and it does, it's perfect. Right, so if I press play pause...
The track I'm using, by the way, is by Danny J. Lewis. It's entitled Feel It. It's from 1996. So press play pause. I'm going to press play pause again. I'm now going to press the next icon, which is the circle with a line in it. And I'm going to press play pause again. I'm now going to press the cup of tea. I'll look now at the software and see what happened when I was doing that. I'm going to turn this light off now. Right, we'll go a little bit closer. Right, I'm now going to do exactly, well, hopefully exactly the same. Press play pause. Press play pause again, stops. Press play pause again and it starts from the point at which it stopped. Press play pause, I'm now going to press the circle with a line in it. And you'll notice two triangles appeared there, one facing down, the other one facing up. What I've done is I've now set a cue point. Press play pause. I'm now going to press the circle with a line in it and we've gone back to that cue point but the track has stopped. I'm going to press play pause again.
I'm now going to press the circle with a cup in it. It's gone back to the cue point I set, but the track carries on playing. So if I was to press the circle with a line, it stops, press play pause. If I press the circle with a cup in it, it goes back to that cue point. So straight away what happens there is circle with a cup goes back to the cue point, carries on playing, circle. Sorry, the icon, sorry, the button with a cup. It goes back to that cue point, carries on playing, press the circle with the circling or the cue point, bloody hell. Sorry, I'll get there. I hope I'm not confusing you. You're nodding your head going yes. I pressed the circle with the circling with the line and it stops. Relatively simple once you know what you're doing. Sorry if I confused you. Right.
5:10 Just going to press play pause there
Just going to press play pause there. Okay, this icon here will let you go into or out of scratch mode. So if I press, and first of all you'll be going, uh, I'll explain. When that LED there is shining, and it's an LED to the right-hand side of the left-hand platter, around about sort of 1 o'clock. Yeah, on the, sorry, on the left-hand platter here. On the right-hand platter, the icon is to the left-hand side about 11 o'clock. So you'll notice this icon at the moment is shining, what is it, red? Yeah, it's red. OK. If I press that, we can still scratch. Now, the reason for that is now we can probably cue a point. Get to that point, cue it up, and that's where we cued. But while the track's playing, I can now use the platter if I turn it
Clockwise to speed the track up, or anti-clockwise to slow it down. So I can use this function in conjunction that rhymes with the pitch control. If I then engage the icon, I can now scratch, crossfade, two up-faders. Like a lot of controllers these days, you've normally got quite a nice dial center position and that... This is where you can scroll through your tracks, your folders on your PC. So you'll notice here if I scroll up and down, I can scroll through the tracks I've got there at the moment. And you can go back and these guys here are there for loading up the tracks. So if I just go up there and load Danny J Lewis again, it starts all over again. Alright, if I put that light on again now and move the camera like that. Right, let's have a look at...
7:54 Above the pl
The DJ Tutor offers a wide range of functions, including filter effects, low, bass, mid, high, and gain control for the VAT channel. Here's your master output and it says it, master output. Below that we have a booth output so for example if you're using this say in a club or a mobile environment you can have your own little monitor PA system. Headphones, cue mix for your monitors and sampler volume. We'll have a look now at an area around the top of the unit just above each platter so whatever I'm about to explain above the platter on the left hand side will be exactly the same on the right hand side. We have hot cues here, 1, 2, 3 and 4. So what I'm going to do now, I'm just going to randomly press these hot cues. So I've engaged four hot cues and I'm going to press these again. Alright, how do we get rid of them? We've got on the left deck, around about 7 o'clock, we have a shift delete. What I need to do is press that and then while I'm holding that, press down the buttons, hot cues, and now...
Those samples have gone, sorry not the samples, the hot cues have gone, but if I press them again, when they're shining, I've now got a new or new, depends on how many you want, hot cues. Press that again, away you go. Alright, we can form a loop as well. Above hot cue 2 and 3, we have in above 2 and out above 3. So if I press in, out, we've got a hot cue, sorry, hot cue, we've got a loop. Getting confused myself now. All I need to do to get that loop out, press this button here, loop. So do that again. Forms a loop and we can see that loop on the software and I'm going to press this. We'll have a look at the software and I'll press that. There you go, the loop's gone. Okay, pitch. If you move the pitch away from you, the track will slow down. If you move the pitch towards you, it'll speed up.
10:25 Software, if you take a look
You'll notice there when I get into the centre point, we have a blue LED. That means we're at the centre point which is near enough to the precise speed that the track should be. We have this guy here, an icon for pitch range. While I'm pressing that, if we have a look at the software, if you take a look at this area here, while I'm pressing that, we go from plus or minus 8, 16 and 50. So that will give me the option of increasing or decreasing The speed of the track by 8%, 16% or 50%. And that's the percentage of the original speed. We've got here this icon, key lock. Have a listen. With the light not shining, not only will I be able to slow the track down but I also will be able to just disengage the key. Press that. Now the key stays the same but I can still increase or decrease the speed. It's great when you're mixing tracks
And maybe the speed of the track you're mixing. There's quite a difference in speed. Let's have a look at some of the effects. Effects 1, 2 and 3. To turn them on, you press the buttons just underneath so you can see the LEDs highlighted. With the LEDs off, no effect. Right, I'll just zoom the camera out a little bit. Right, so to get a vinyl turntable plugged in. First of all, you'll notice now... No, well the volumes are down so I'm just going to make sure that that level is up a little bit and right there you go I'm moving the vinyl but you'll notice the volumes are down. Alright what's going on here is on the back of the unit which I'll show you very shortly there's an area where you can plug in either one vinyl turntable or one CD player.
12:48 There's no need to unplug things and mess around
But, alternatively, what you could perhaps do, you could have a separate mixer. So you could go, say, into your separate mixer, your CD players, your vinyl turntables and use the effects, the bass, mid, treble on your separate CD player and then from that CD player you can then go into this guy here and then from here out into the main PA. So what that means is that, let's say for example, if you're doing a set with someone who has got some hardware, you can still carry on. There's no need to unplug things and mess around. You have the other DJ who has his or her CD players, vinyl turntables, and then they go from there into this, and then you're doing your set with your software, bang, as soon as you've finished, the other DJ can go and carry on. So, if we press play, hold on, oh the track's finished.
Let's have it. We'll grab another one. Hold on. Bear with me. Talk amongst yourself. Alright, so you're doing your set. You've finished your set. Alright ladies and gentlemen, thank you very much. Bang! Bang! Away the next DJ goes. Alright, so I'm just going to take the camera off the stand and we'll show you what you need to do. On the front of the unit you have input routing phono line and you've also got this level button here. So you need to make sure this button here is switched over to MST and that's your level. So that's almost like the volume control for the input. In other words, the volume control for either the vinyl turntable, the CD player or alternatively, like I said earlier, if you've got a separate entity altogether, you've got CD decks, the whole lot.
15:10 Back of the unit again, we
Right, so let me think, shall I pause the camera? No. Tell you what we'll do. I'm going to turn this off in my punk style and you'll just have to sit and talk amongst yourself. I'm going to turn the software off. So if we just press the, I'm just going to click on the top icon up there and it's got exit. Do I want to exit? Yes. So that's now finished. And there's the unit and on the back of the unit I'm just going to, where is it now? I'm going to press there and that's off now. So I'm going to unplug, I'm going to unplug and I'm going to unplug my power. Right so if we have a look at the back of the unit again, we have LN which is short for line and we have PH which is short for phono. So I'm going to make sure I've got either line or phono.
And then there's your input. And then there is the earth cable if you're using vinyl turntables, but of course if you are using an external mixer, then of course you'd attach the earth cable to your external mixer. In brief, you have your input there. Now you notice that thing there? That is to attach your cable to. So you've got your input and then what you need to do is unscrew that and attach the cable through there. Plug it in there. That's your on-off, that's your USB. Master balanced. Balanced quarter inch jack. Let's say you're using this at a gig. I recommend that you use balanced because you won't get much loss of any sound or signal should I say and you won't get much interference also. Master unbalanced if you're at home and maybe your powered speakers or your amp are a couple of foot away, fine.
Booth RCA, like I said earlier, that's for your monitors. And that's about it. So, alright, it's a basic overview of this guy here. It is well made as well and what I'm trying to do is give an expert, a very basic explanation on how it works, also what it's like. I have had lots of kit, lots of controllers and whatnot and this is one of the controllers out there. Thank you for watching. See you next time. And if you have got one, why not do a video response bit of a mix on it as well. I will put information on this particular product in the description and I'll leave you with practice and enjoy. Thank you very much.
This transcript was produced automatically from the audio of the video and may contain mistakes.





