 8:51
Ableton Live Tutorial video 4 with Danny Lewis
Contents of the video
0:03 Hi, it's Danny Lewis from Point Blank Online
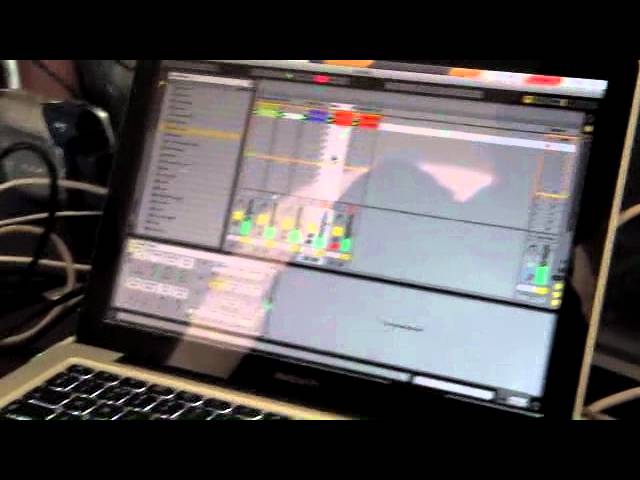
Hi, it's Danny Lewis from Point Blank Online. This is part four. So what we're going to do now is we're going to add some effects. I'm just going to play everything again. And what I want to do is I want to add some reverb onto the clap firstly. So this is the 808 clap, so the classic drum machine. I'm going to come over to the left hand side on the browser and we're going to come down to the audio effects. I'm just going to double click the reverb. So you can feel that we've got that sense of space now behind the sound. And I just want to make a couple of changes to this. I'm just going to turn off a couple of these parameters and make it a bit longer. It's going to be brighter now. You'll see how that sits in the mix. I don't want it to be too reverbed. But I think it adds a nice sense of atmosphere to the track by doing that. What you find with effects is that they can make a track sound a little bit more professional. That's the whole concept when you're adding these things.
I'm also wondering if maybe with that clap, it'd be quite nice to have a little bit of a delay on there as well. And so this is the same as adding like an echo or something. If I double click on here, it's got a nice little vibe coming from that. Just going to EQ the delay here. Going to reduce the amount of delay. So it's a nice little subtle texture in the background now. It gives the track a better sense of an atmosphere.
1:43 I'm just going to drop this on as an insert on here
So also this tom I want to do something with this. And possibly a delay. But I think more so a case of the reverb again. I'm just going to drop this on as an insert on here. Do you think sometimes you can overdo the effects? Yeah, totally. I mean if you have too many going on, what it does is it creates a kind of mushy texture where you're losing definition. So it's really a case of just trying to be quite subtle in some cases. But you've got to make a decision in your mind. What do I want the sound which one is going to have the most effects on it really. You don't want to have everything with tons of reverb. So I wouldn't apply that same reverb onto this tom for example. I'm going for something that's a bit more
Short and subtle. So it's just a little bit of space around that. And this could actually be a sound that's a little bit too thick in the mix again. I might need to EQ this. And so what I'll do is I'll show you again we're going to bring on that spectrum and you can see it's actually got quite a lot of bottom end on there as well. And so I'm just going to do that now. These days, a lot of people will actually mix as they go along. It's definitely something that I do. I like to try to get things sounding tidy as I'm going. So the old school approach was we used to basically mix later on in the composition process. But with electronic music, you tend to do it as you go. So look, it's a lot tidier there.
All those elements are sort of gelling together really nicely now. But we could pan this. At the moment that's dead centre. I can pan it over to the left. You see I'm dragging here. You see the green bars here represent the actual volume of the sound. I'm going to pan it over to the left and right. As I come over here, it's pushing the sound to the left. So that could be really nice. And the tom that's coming from the other drum beat. So if I expand this. We had a 909 tom. I'm going to pan slightly over to the right so we get a little bit of a contrast between those two tom sounds. So I'm going to do that. Or couldn't you have one on one side and one on the other side? You could but I wouldn't go panning hard left and hard right. It's too far with such a strong
4:25 I think, oh I'll take it a bit lower actually
Energy sound. So I want to keep them just slightly apart. That's like 21 to the left on there. The other tom, 20 to the right. Got a nice little vibe on there. Potentially this tom as well. This could be a little bit thick. The 909 toms, they were actually very heavy. If you listen to that on a big system it's going to be very bassy. So look I'll show you here. You can really see that on the left hand side. So I'm going to use an EQ3 again drop it before here. Clean off the lows. I've lost too much there. So down a little bit more. So it's nice and tidy. I think, oh I'll take it a bit lower actually. Yeah somewhere around there I think. Maybe just a little bit more as well. It's quite liking the bottom end on there.
So one of the things that I'd say to people when they're starting off is if you've got a sound like that that's got quite a lot of low frequencies you probably wouldn't want to put your bass sound at the same time. You'd be thinking about maybe putting a bass line at a different position in the grid. So you don't want to get too many elements in the same place at the same time. But of course by you reducing all the bass from the toms means there's more room for the bass line. Absolutely, yeah. Yeah totally. So we've got some nice effects there I think that's really helping things to see what's going on with the pad So I think in a way it's going to be a case of now thinking about other elements that are missing
We're thinking about maybe a bass line or something so what I'll do is I'll go through and we'll pick something to use for bass. We've got a different variety of instruments that are available for doing this On the left hand side we've got the operator and we've also got a thing called analogue So these are two potential things that we could use for the bass And I think in this case the analogue is going to be the one to go for So what I'm going to do is drop this in and this is going to be available for me to play At the moment it's not going to be the right kind of sound It's actually a sawtooth So what we want to do is just to see if we can find a bass preset So I'm pushing the button over here again This is what we call a hot-swap button
Can you just show how you got to that point now I just missed that on the camera It was probably Let's take this one away So I'm going to drag it over So this is available now
6:33 Command plus, quantise
And I'm going to click on this button here So the hot swap You're going to see now we've got the presets If you're looking for synth bass I'm going to open the folder and let's have a look See what we've got here Let's double click on that Funnily enough, that's actually the kind of vibe that I was thinking of That's just pure fluke Because I don't know these presets very intimately So that actually is a nice bass texture that I think could suit this It's quite warm, quite bouncy Not too buzzy I think that could suit it So I'm going to have a listen And then maybe refine that I think it's a basic idea That's going to be good So I was trying to avoid things like the toms I was trying to place that so it wasn't occurring at the same time
Just filling in some space Let's have a look Yeah, so I think that's going to be a good idea for the moment That clicking you heard Was one bar counting Yeah So I'm just going to take this And see how that feels I'm going to quantise it So just explain again You press to quantise Quantising is, I selected all the notes first So that was command plus A And then I did command plus U To quantise Just looking into the grid So I think we've got The foundations there now For doing a little bit of structuring So we'll do that in the next video Alright nice one, practice and enjoy, thank you
This transcript was produced automatically from the audio of the video and may contain mistakes.