 20:23
Pioneer DJM-450 Review and Simple DJ Mixing Lesson BY Ellaskins the DJ Tutor
Contents of the video
0:00 Back USB in, so of course
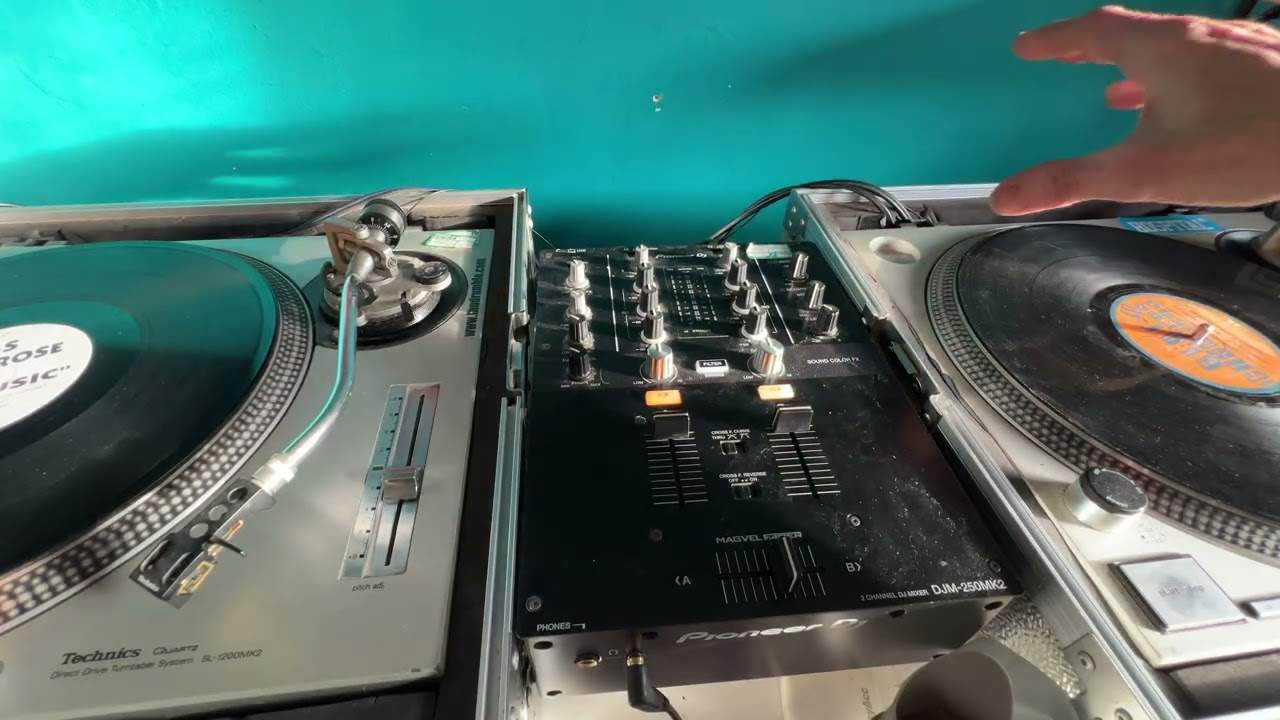
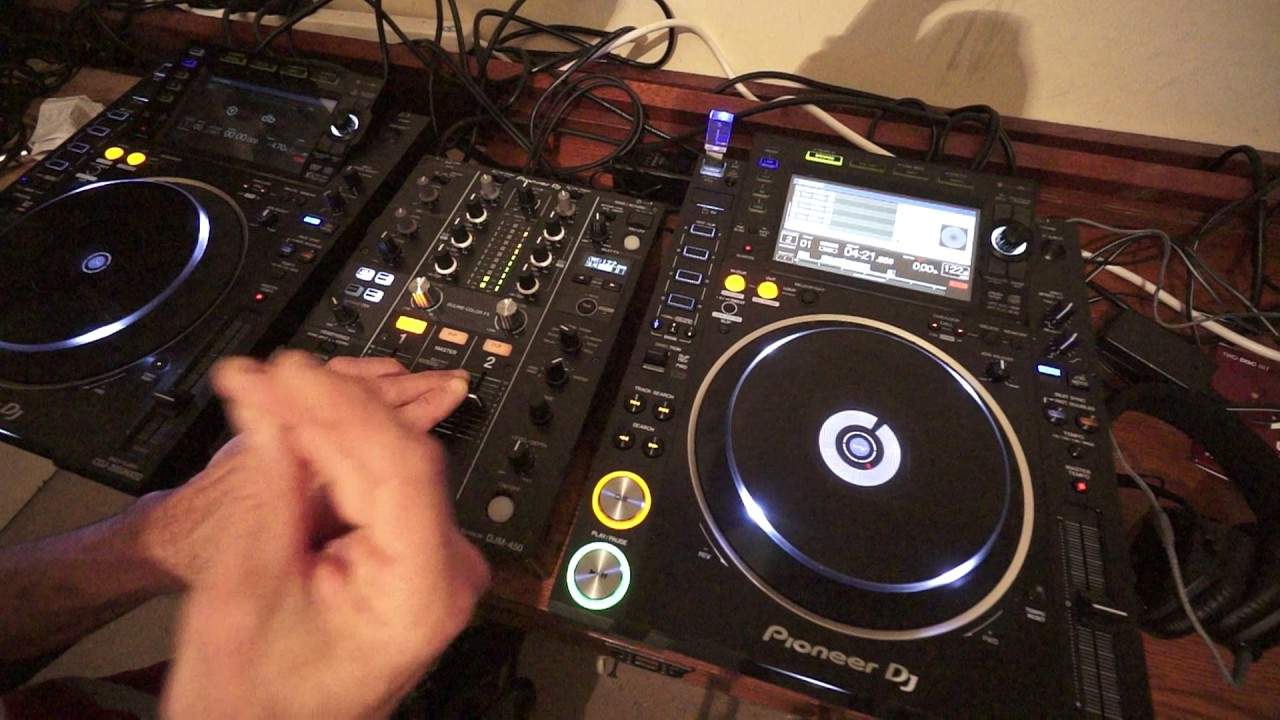
How you doing? This is my review on the Pioneer DJM450 2-channel DJ mixer. First of all, a quick look at the back USB in, so of course you can use it with quite a few programs out there. We have a balanced mic input, we have auxiliary in here, then we have channel 1, phono and line, and phono and line for channel 2. Now what that means is, see this auxiliary input here? If I switch that to auxiliary you can in a way have three channels. Now you may not be able to have bass, mid and treble. I will show you on that channel but I don't think it matters that much actually. For example let's say you're at a gig and someone thrusts an iPhone in your face and says can you play this track? So long as you've got RCA2 mini jack, you can do so whilst in the mix if you want to. A rather large knobbly bit here which I like to see. None of these flimsy kind of things. That is for your earth connection for your vinyl turntable and I will explain in slightly greater detail later on but we have
Master out XLR and RCA. The only thing I don't like about this mixer, and this is not about this mixer, it's about mixers in general who have a separate power supply for them. The only reason I don't like that is because if you've just travelled 50 miles to your gig and you plug everything in and you go to plug your mixer in and you've forgotten your power supply, you're stuffed. Because you need the power supply, you can't just grab another kettle lead or a small S-type lead. So, right, let's have a look at the front of the mixer. Now first of all, very importantly, some people are saying that this is a bedroom mixer, you can't take this to a nightclub. Well, I would tend to look at the back. If a mixer has got an XLR out, a balanced XLR out, then that means...
2:42 For your separate line auxiliary in
It's there for a purpose. It's not just RCA out where you've got like three foot of RCA cable into your little powered monitors next to your bed. No, what that means is you could have 20 metres of cable directly to a rack of amplifiers and you're not going to lose much sound quality at all. So this is very suitable for mid-size kind of nightclub. But then again, you know, a lot of nightclubs are going to have to have four channels anyway. All right, so you've got your level there. For your separate line auxiliary in. Bearing in mind auxiliary in, you could even plug a CD player into there as well if you wanted to, but you don't have the use of low, mid and high, which you do on the other two channels. Okay, so from, I suppose from left to right really. Microphone level, pretty straightforward. We have a tone control, we don't have bass or treble, and to be quite honest, the tone control is enough.
Now what we've got here is these nice colour effects. We have dub, echo, sweep, noise and filter. And we have the parameter so we can set the sort of amount of depth we want for that effect. Now the tune I'm using here is by Mr Kenny Hectic. There will be a whole bunch of info. Let me just make sure I've got the name of it. Unity, it's the extended mix. There will be information on this track in the description. Press play and away we go. Alright, so pretty much the two channels, they're identical. Trim, of course, high, mid and low, and directly below that is a big humbersome knobbly bit. That is for your sound effects. So let's do a bit of dub echo. Liking it a lot. And sweep. Okay, they forgot to put sooty in this. Swing it forward a bit. Now this...
5:02 Dirt, that's because you've got the cue button set
This effect is a little bit like the original 900 Nexus, the gate. A little bit, because what it does, it seems to cut out some of the frequencies. It's almost like someone's talking to you away from the actual, whatever they're saying to you. So we go to low, turn the sound colour effects to high. It's a little bit like a filter really. Noise, using the parameter dial. Unlike the old mixers where the noise was very loud and you had to use the volumes to set the level of the noise, now you can use the parameter dial and you can have that in the background or in your face big time. Okay, of course below each channel we have our cue buttons and in the centre of the mixer we have the cue button for the master so don't forget if that is pressed along with one of the other channels and you're wondering why you can
Here we bleed through from the entire mix. Dirt, that's because you've got the cue button set. And of course, the only way of finding out if it's on is it's shining. If it's not shining, it's not going to come through your headphones, you muppet. Okay, headphones mono split and mixing on your headphone dial. Now this is very important. Pay attention new DJs, because if you have for some strange reason got that dial set at 12 o'clock and you've done as everyone says including me in many of my tutorials all you have to do is press one of the cue buttons and you can hear that track and nothing else but you still can hear the rest of the mix. That's because the mixing dial is not set to Q which should be set to 7 o'clock
If you set that dial to 7 o'clock, then you will only hear what you have cued up. But of course, that's based on if you're going to turn up your headphone volume in the first place, which you've got to do. Very quickly, front of the mixer, which every single mixer should do from now on until the end of civilization, is have two inputs, one for quarter-inch jack and one for mini jack. Two things there. One is if you forget your quarter-inch jack, no worries. And the other one, if you've got some dodgy DJ next to you who wants a bit of a set up, then you can get him or her to plug in and pull it out after you've had enough of them. Another very good feature is the EQ Curve. Isolator. Now, what does it mean? Well, when you set that switch to EQ, it means that when you turn any of the low, mid or high all the way down to 7 o'clock, you will get the sound, that frequency, sorry, reduced by 26 dB. So, in other words, what that means is that you also have a little kind of feel of the bass, middle, treble, but it's not going to completely disappear, so...
7:40 Isolator, now that frequency will be
On the other hand, if you go to Isolator, now that frequency will be completely removed from the mix. Alright, so on the other side, the right-hand side, we have return type auxiliary inserts, so of course you can, if you want to, plug in your USB, USB on and off. Also, below that now, we have our beat effects. Now this is where it gets very interesting because what we can do now is we can visually see the timing of the effects. Now some people, in fact I did a tutorial a while ago and the chat had no idea what the tap button was for. It's got nothing to do with hot or cold water. What it is if you want to, you can manually press the tap button in time with the track and it will give you, when I say a rough...
9:37 Distinguish between the delay and the echo
If you're going to be using rekordbox software, quantize everything, then there's probably no need even to touch the tap. We're going to go back to one, I'm going to set this to echo, we're going to go to channel two, okay that's an echo and that's echoing in time with the track in one beat. One, two, three, four, one. Okay, if I get a three quarters now we'll get three quarters of an echo which is a great sound to have in a house track if you want to fill that sort of steady four-to-the-floor time. Have a listen. Any time during the course of you having an effect even while the effect is engaged of course you have to press the button bottom right hand corner if This is the delay. A way to... Distinguish between the delay and the echo. The delay is a little bit like an echo, but as soon as you bring the volume down, that's it. You don't hear anything. On the other hand, if we go to echo, it's a little bit like the delay, but you still have remnants of the delay even after you've turned the volume down. So that's the difference. Okay, spiral. Reverb. Now again, if you like using the microphone,
12:34 Other side, if I press
And let's say, for example, you've got an MC. Give them a little bit of reverb, not too much. What it does, it enhances their sound or for that matter, it can actually make them sound a little bit better as well, actually. Trans. Okay, a way of describing the trans, what it will do, it will chop the sound up for you. So it's a bit like this. So if the beat's going one, two, three, four. Okay, so I'm going to tap in time. Get a half. She also had a duck. She used to play with the little lamb and then she had some sausages. And we're going to go to flanger. Oh, we like a bit of flange. Said the bishop to the actress. And pitch. Pitch is good fun. Okay. Because what I can do now, I can use my timing dial, which is below the knob that selects the channel you want the effect to go on. Now again, I'm going to talk a little bit about the pitch in a little bit, but roll. What the roll will do is it will roll that part of the track. So you see I can stop that track now, okay? So I can stop that and if I wanted to, if we go to the other side, if I press link...
And go back to Mr Kenny Hectic himself. It's now on the other side. Alright, a little bit more to it because you've got to make sure it's in time and so on. But what that means is let's say the proverbial hits that rather large thing that flies around really fast and if something sticks to it it's not a good idea. Let's say you're having issues and you can't find another track to play quick enough. You go to roll, maybe do a roll of... Two or four bars that will roll, which gives you time to bring the next track in. But the pitch, pitch is great. I don't think I have a microphone. Do I have? Yes, I do. I have a microphone here, which is great. So what I'm going to do now, I'm going to quickly, very quickly show you how you can annoy the MC big time. And guess what? No, I can't do that because it's a jack input. Sorry.
I had only had XLR. But what you can do is, again, if you've got an annoying MC, go to pitch, you can switch your dial to MIC, which has nothing to do with small little squeaky things. It's for mic. Yes, I'm dyslexic, can't spell to save my wife. And that long story. So you go to pitch, you go to mic, you engage. And while the MC is going, yeah, on the mic, man, I'm so cool. You can start... Turning that dial, the time dial and his or her voice will slightly go higher and higher and higher and they will have no idea what's going on. Or if they do have a really squeaky voice and it's really annoying like some people, including me, then you can reduce that so you can make them sound really, really deep and terrible. Alright, so let's have a look.
14:56 The crossfader is a good quality mixer
The crossfader is a good quality mixer. If you're an old school DJ like myself that likes to really use the up-faders, you can set the crossfade curve to the through position which means the crossfade is now disengaged and you can just leave it there and it's going to do nothing except getting away on the odd occasion. On the other hand, you can set it to the centre point Which is great for good smooth transitions. So your two volumes are up on channel 1 and 2, and let's say, for example, you're playing a track on channel 1, the left-hand side, you can then slowly move the crossfade over to channel 2 and get a nice kind of blend. On the other hand, if you switch the crossfade curve far right, that is great for scratch turntablists.
A track is playing on the right and as soon as you move the crossfade over, you're going to get pretty much max volume on the left as well. So don't be disheartened if you think there's something wrong with the mixer. There isn't. If you are a mixing DJ and all of a sudden you move your crossfade over and the sound comes booming in on the opposite side, just make sure you've switched that little switch to that sort of kind of curvy look. It's a little bit like putting one hand over the other as a cross and then just curving your fingers down very slightly. So also what we have below that is the crossfade reverse. Now this is fantastic because what it means is if you want to play the left deck on the right side and the right deck on the left side, you can do so. To me that's very confusing but I'm sure that's...
17:35 I hope that's been a help
Box standard for turntablists, but not me. I do a little bit, but it's the equivalent of like a small mound compared to Mount Everest for some of the geniuses out there. Alright, so at the top of the mixer what we have very simply, the switches for your laptop line. The DJ Tutor is available for free at Ellaskins.com. I hope that's been a help. Again, I'm going to go through the reverse. Let's go back to the beginning of the track and listen to noise. Filter is probably one of the best effects of all time. So again, a quick tutorial now. If you want to learn how to mix, don't forget I do. Here's a good tip for you. Each deck you have to the centre position, which is what I'm going to do now. Bearing in mind at the moment I don't have any headphones so it might go off very slightly but this is really a demonstration and the info on the lessons was really like an afterthought. So I'm going to go towards the end of the Kenny Hectic track. Just move this forward. And I've got the beginning on the other side.
Okay, that was the beginning of a new phrase. Have a listen. All I'm going to do, I'm going to do a beginning and end mix. And I'm listening for the phasing sound. This is the best way of learning how to beatmatch. And if you want to know more about this way, then give me a shout and I'll teach you. Now lastly, what I will say about this mixer. Let's imagine that you are in a position... If you want to buy the top of the range turntables but then you're not in a position to buy the top of the range mixer or you don't have enough to buy all of it, then perhaps consider a setup like this because you've still got the quality of sound but at the same time you've got the durability and all of the features of the high-end CD players. So once again check out the links in the description and give me a shout if you want some lessons via Skype.
Thank you very much to Mr. Kenny Hectic, practice and enjoy.
This transcript was produced automatically from the audio of the video and may contain mistakes.