 16:09
Using Soundflower and Kontakt for Sampling and Manipulating Audio
Contents of the video
0:04 Lewis, course developer and tutor here at Point Blank Online
Hi, this is Danny J. Lewis, course developer and tutor here at Point Blank Online. This week I've got a great video for you. It's covering two things. The first of which is to introduce you to Soundflower, which is a really good tool for grabbing audio from the internet. I'm talking about maybe from YouTube, from QuickTime, from iTunes, any of these places. So if you hear something, you can rip it very easily for processing and integrating into your own compositions. Now the other thing is that I've noticed a lot of people talking about Kontakt. I mean, I featured it on a couple of videos, but I noticed, for example, Ben Whispbeach on Twitter the other day Soundflower and Kontakt to get some really interesting sound.
Sound design down. That bumpy underground 90s vibe is back, so this musical example is that style and it features some of the techniques you're going to learn about in the video. So you've heard the example I created using this technique. Here's the Soundflower landing page. So there's the web address. Put it into your browser and then head over to free download. You've got a list of the files here. I'm going to go for the latest one and I'm going to save this to the desktop so you can see it downloading. So it's going to come down here. And once that's finished, just install it as you would any other DMG file. So I'm not going to go through that process. I'll come back on the other side and show you how to use Soundflower Bed. So Soundflower Bed is a small application. Just going to come up here to Spotlight and type in Soundflower Bed. And you can see it listed here. I'm going to click it. You can see now that this is running. So what we need to do is to configure it. So the two-channel version is the one that we're using.
We're not using 16 channel. And we're going to come down to select the built-in output. Okay, this is what we're going to use to hear what's coming through Soundflower. You may have an interface that you want to select. Of course, go ahead and do that. But for me, I'm using the built-in output. So that's the first stage. Now, I want to record some stuff from YouTube. The vocals that you heard are basically coming from a YouTube video. So we come to System Preferences and we come to Sound and we route the output of the Mac operating system, in fact, to Soundflower 2 Channel. So that means anything that is coming through QuickTime or iTunes or the browsers, that's going to be able to be recorded into either Logic or Ableton. So this is the initial setup. That's the routing. So the output goes to Soundflower 2 channel and Soundflower sends the information that's coming through to the built-in output or of course your audio interface.
3:11 It sounds like at the moment
So I've got Logic to start with. I've got Chrome over here, so the browser, and I'm going to record some audio from DJ Tutor's little speech about becoming a world-famous DJ here. So I'll show you what it sounds like at the moment. But at the same time, follow trends from the outside. So some advice there, and what I need to do is to set up Logic here. We come to the audio, and we say the input device is Soundflower 2 Channel. Apply changes. So this means that the signal that's coming through Soundflower, we can now record into Logic. So the audio track here is ready. I'm going to push record enable. Just going to show you. Let's get this running. Going to record now. And it doesn't matter about the click or the tempo. Let's bring this back on YouTube and let's play. Become famous. It's very simple. Be different. Follow trends but at the same time...
Follow trends from the outside, don't follow trends from the inside. In other words... There we go, some interesting words and we can see now if I double click, come over on the sample editor, audio recorded. Set up live, we come up to live preferences, audio tab, input device is Soundflower 2 channel. And also, I would suggest setting the output as well so you can hear stuff afterwards. That would be the same in Logic 2. So we're ready to go with the record enable on the actual track. You make sure that it's red. Gonna play Jonathan. Follow trends but at the same time follow trends from the outside. So let's stop the clip and you can see this here. Let's have a listen. But at the same time So this is ripe for experimentation now. We can record from anywhere, iTunes, QuickTime, anywhere that's playing on the Mac and we can record that through to our DAW of choice.
5:30 This has been a bit of a secret weapon for me over the years
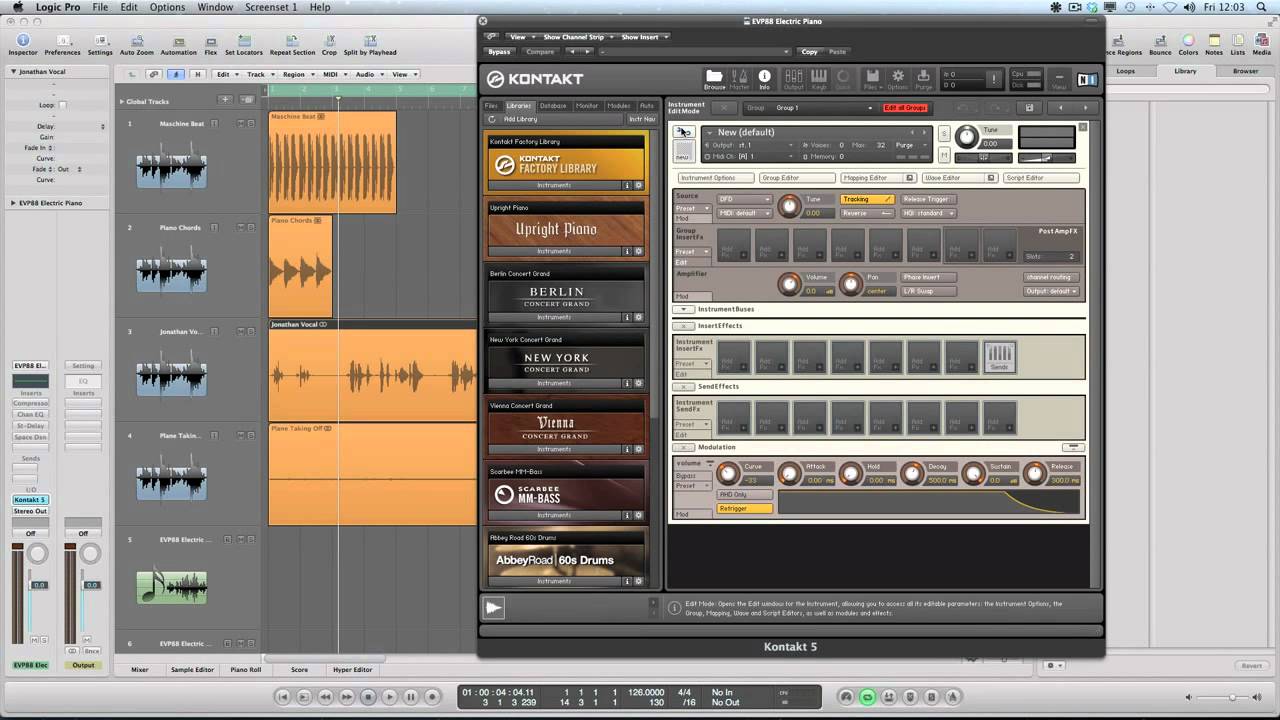
So I'm using Logic for the demonstration, but you could use any DAW because I'm going to be featuring Native Instruments' contact sampler. This has been a bit of a secret weapon for me over the years. I've noticed that quite a few people are talking about it. I mentioned that on the intro. So we're going to have a look. I'm going to show you one of the key kind of sound design and experimental techniques that you can use. So software instrument, I'm going to go for multi-timbrel because I want to have several instruments coming from the same instance. So I'm going to click on create and I'm going to load on here. We're going to choose instruments, native instruments, contact 5 and we're going to go for the multi-output stereo version. And I'm going to set this up so that I can use some of the assets. Now you may have seen on my Logic project I've got a few bits and pieces here. One of them is the vocal that I recorded through Soundflower of Jonathan DJ Tutor. I've got a plane taking off.
I've got some piano chords that I created in Logic and a beat I created in Machine as well. So project's at 126. I want to try to create something interesting with these elements. So what I'm going to do with the vocal is I'm going to bring this through as an instrument. So if we go to files, new instrument, and we're going to open it up clicking on the wrench and click on the mapping editor which is where we can place samples onto the keyboard for triggering. I'll show you if we come to the file browser, you see on the desktop I've got a Jonathan Vocal here and I can drag this on. And what I'm going to do is span it across the keyboard on one key. There is a reason for this and you'll find out in a second. So here it is. And the reason for it being on one key is because I want to use Kontakt's ability to slice up the vocal into individual sections. And we can do this by coming onto the Wave Editor. So if you click on Wave Editor and we scroll down.
7:14 Sync and slice and what we
You're going to see we've got different sections here. Okay, contact is a very complicated beast and we don't have enough time to go into massive detail here but I'm going to show you. We go to sync and slice and what we can do is we can actually slice it up and we're going to do so using something called the beat machine. When we click on this you can see a grid and this is at the moment running with this subdivisions set up according to the actual rhythmic grid, you know, the quantized grid. So The slider here to pick out main kind of sections of the vocal, very similar in fact to using Recycle. Now there are going to be some here that I don't need. They're going to need to go through. It's going to take me a little bit of time but I'm going to take away the ones that I don't want. I'm looking to get the main sections of the vocal here and I'm not looking for this to be ultra precise to be honest. I think I'm looking for just certain key phrases
I want to work with those. So just taking this one away, you can see here we can just click on it when it's highlighted, we can take it away. So I'm going to work on this, I'm going to get the main section sorted out and I'm going to show you then how we can actually work with this sliced up. I've worked through this, I've picked out the main sections of the vocal and that did involve actually me manually adding a couple and moving some. I'll just show you here if you want to add one, click on the plus, you can put it anywhere you want. Just going to take that one away. And then the other thing is if you want to move stuff, deselect over here, pick up one of these and then move it. Okay, but I'm not too fussed about this being ultra precise because I want to do something abstract with this. So basically the whole concept is that for every one of these vertical lines we're going to have a sample on a new key on the keyboard. And so I'm going to get this set up. You can see I've got my original sample here on C1. I'm just going to go from C2. So say the map bass key down here.
If we just untick this and then we go here, C2, that's going to be our reference point. So we're going to have all the slices going from C2. So we're going to have one of these sections per key on the keyboard, which is going to be great. And to actually get this working, I need to pick up this drag MIDI to host and bring it over onto Logic. And now you can see this setup. We've got all of the slices ready. I don't need this actual MIDI data, so I'm going to delete that. But we can start working on processing the individual slices. To process everything together using the time machine, I need them all to be in the same group. Let me show you something. If I click on the group editor and I select in the mapping editor, you can see where it's actually set up in the groups. Now my new slices are in their own group. So I'm going to double click and I'm going to say time machine. And in fact what I will do is this group here
I'm going to basically take away the original sample and I'm going to say here, delete selected group. So I've only got the time machine group. And every one of these slices are located inside the group. It's a very important part of contact you've got to understand. So groups allow you to process them all together. And I want that because I'm going to use the time machine on that complete group. So let me take this away. The source module is where we actually set up the time machine. And I'm going to drop down and we're going to go for time machine here. This is the original mode which gives us independent control of tuning, speed and also the grain size. This is very experimental. We can slow a sound down without affecting its pitch.
10:53 I'll set up the hardware controls
Or we could adjust its pitch without affecting its speed. This is an amazing thing to be able to do and we can do so under MIDI control, which really brings a hands-on vibe to it. So in the next part I'll set up the hardware controls on the machine to tune, speed and grain size, which are gonna give us a ton of scope for sound design. Okay, so the three most important parameters on the time machine are tune, speed and grain. I'm gonna map these to a MIDI controller on the machine. So right click, learn MIDI CC, gonna rotate Follow trends. But at the same time... Now what I've done is I've taken the speed down to 1%, which is essentially freezing time. I can now take the grains and make them bigger, and smaller down to a really buzzy texture. Look what happens now if I adjust the tuning. So back up to normal roughly, there's edging forward. Follow trend.
So it's a technique you've heard on a lot of contemporary tunes and we can play around with this and experiment, you know, recording the results into the sequencer to get something that we can piece together as some kind of an arrangement. So it's more a kind of spontaneous performance sound design and we can pick and choose the best bits afterwards. So let's take a look back at the project that you saw on the beginning of the video and I've got soloed the Jonathan Abstract Vox region here which is actually a sound effect so have a listen.
13:30 Tuning is a key element here
So taking a look over here at the time machine settings, the speed is at 1% to create a sustained sound. You can see in the MIDI region the different note lengths to create the texture and there's a grain size of 35 milliseconds so that we can hear that buzziness there. Tuning is a key element here. You can see the MIDI controller data rising, falling and then rising again. So that's creating that effect. Now also... There is a plane taking off. This is something that I recorded with Soundflower and I just simply typed into YouTube, plane taking off, and it was one of the first ones that came up. So that's a nice simple one. That's just going through a couple of insert effects here. The CMX to add a little bit of widening and the tremolo to move the sound left and right. So the other element that is in contact is the piano stabs. If I fold up Jonathan Vox here on MIDI Channel 2, we've got the piano. You can see that I've got these chords cut up now.
So these originally came from Logic and these can be triggered. And also I put some up here as well because I wanted to be able to experiment and transpose some of these upwards. So it brings more creative scope. I didn't actually end up using them in the track, but it's a nice thing to try sometimes. Now the key to this sound is the filter. So you can see here that there is a low-pass filter. This is the Ladder LP2. And this is being controlled by an envelope here. So if I click on this, you can see down below that this is a filter envelope setting. So it creates some movement there. I'll take it off so you can hear it. And with the filter back on. So it's creating a really nice, interesting element there. So you're seeing here that we've got a variety of different textures been created in a number of different ways. And the starting point was Soundflower. The creative side was working with Kontakt for Native Instruments.
If you've enjoyed the sound design aspects of this video, then you might want to check out the sound design courses that we offer at Point Blank Online. So you head on over to pointblankonline.net, check out the brochure. There's a sound design course that focuses on Native Instruments products and also a sound design course that's specifically for Ableton Live. Also make sure you subscribe to the Point Blank Online YouTube channel. Got tons of videos there for free and you'll be notified when the new ones come up immediately. So click subscribe on youtube.com slash pointblankonline.
This transcript was produced automatically from the audio of the video and may contain mistakes.