 6:50
Vjay Tutorial 2.
Contents of the video
0:00 Icon here, it's an image
Right guys, tutorial number two on the VJ app from a company called Algorithms. In this tutorial I'm going to show you the icon here, it's an image of a hand with a finger pointing.
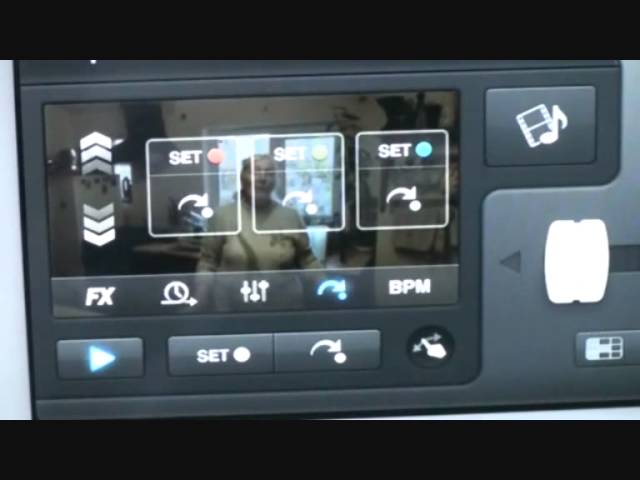
To the left of that icon we have an arrow with a dot, then we have a set and a dot, and then we have a triangle lying on its side. I'm now going to press the icon with a hand and a finger, and we should see from left to right effects. Then we've got sort of a circle with a clock inside it, we've got three small bars with dots on, we then have a similar icon below the arrow and a dot, and we have BPM, short for beats per minute. I'm going to press the effects icon like so, and you'll see a grid come up on the bottom screen. I'm just going to scroll out, because we also need to look now at the icon up here. At the moment I've got fish eye. If I press play, we can see we get this kind of effect. What I can do now, on the icon there, next to where it says fish eye, I can either press the right hand arrow or the left hand arrow,
Also the triangles, and I can scroll through the different effects. Now we're on crush, strobe, twist. Swirl, back to fish eye. Next the effects icon, we've got another icon with almost like a circle, a clock in the middle of it and an arrow. I'm going to press that. Now we should see reverse. We should see a couple of sort of almost like spirals with an arrow facing to the right, two spirals, and then next that one spiral, and then we've got slow mo. So I'm going to press play, I'm going to click on the reverse, press the reverse icon,
And you can actually make whatever is playing go reverse. Press on the first one, which is called slice. It's almost like looping it, a fast loop. The next one is a slow loop, and then the next one, it will actually slow it down, so the track or whatever you're playing. The next icon we have is equalization, or EQ is short for equalization. When we press that icon, you'll see low, mid, and high. That's almost exactly the same as what you would expect to see in a DJ mixer. A low, mid and a high. These will increase or decrease the intensity of your low frequencies, your mid, or your high. Next to that we have gain. That's the equivalent of the volume control. You'll also find a volume control on your iPad or your iPhone anyway,
But this is a good way of maybe increasing or decreasing the volume on the specific track that's actually playing. Excuse the noise in the background. So I'm going to press play, and we can increase. Or decrease. Low, mid or high. And also gain, which is the master volume. The next icon we've got is the arrow with a dot. I'm going to press that. What we can do now, we can set three different cue points at any time during the time of that specific particular video being played. So if I press play, red there, green there and blue there. What I need to do though to set those cue points is I need to press the red, green or blue. Then when I want to go back to either red, green or blue, I need to press below those, we can see the white arrows and dots.
4:35 Next icon, far right hand side is BPM
If I just scroll out a little bit we can have a look at the main screen. To the left of the three areas where you can set cues, you should be able to see some arrows facing up and down. If I press in the middle, you'll notice that the wave format has increased and if I move my finger up and down, what this will enable me to do is fine tune and find precise places where I want to set a cue point. So for example there, with my finger there I can press the red if I want to or the green or the blue and I can set a cue point from that particular point. Next icon, far right hand side is BPM. This is short for beats per minute. On the screen now you should see a minus and a plus then to the right hand side of that you should see tempo
And a long line with a dot in it. Above the minus and plus you should see sync. S-Y-N-K. It's short for synchronisation. So with the video playing... I haven't got any hair! If I press the minus... I haven't got any hair! It will slow down. If I press the plus, it'll speed up. I haven't got any hair! I haven't got any hair! If I put my finger now on the dot we can slow it down I haven't got any hair! We can also speed it up by moving the dot in one direction or the other. If we want to as well, if we press the sync icon when two tracks are playing tracks with certain beats you can actually get the two tracks to sync in time together. Video number 2, I hope that's been a help. Practice and enjoy!
This transcript was produced automatically from the audio of the video and may contain mistakes.