 5:23
A look at a controller and CDJ turntable
On YouTube this video is called Complete Beginner DJ Lessons Video One a Look at a Controller and CDJ Turntable
What this lesson teaches
The first of a numbered series he was asked to make, and he opens by telling existing viewers to skip it. That framing is worth honouring: this assumes you have opened a box and have no idea what anything is.
Controller or player
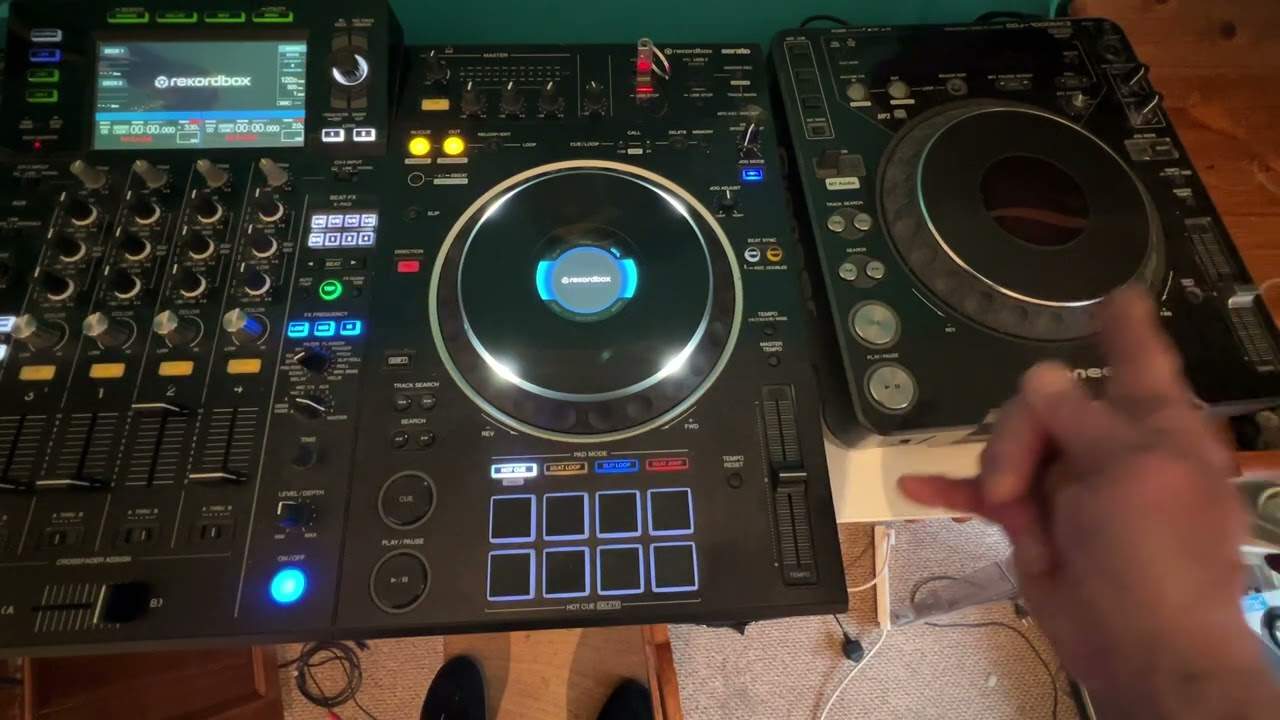
The unit in front of him is an all-in-one controller; beside it is a CD player of similar size. They look alike and they are not the same thing.
The controller will not play CDs. There is no slot. It works from a USB stick or a laptop.
What it will do is accept an external CD player or a turntable plugged into its inputs - so owning one does not shut the door on either format, it just means the disc goes in a separate box.
The deck side
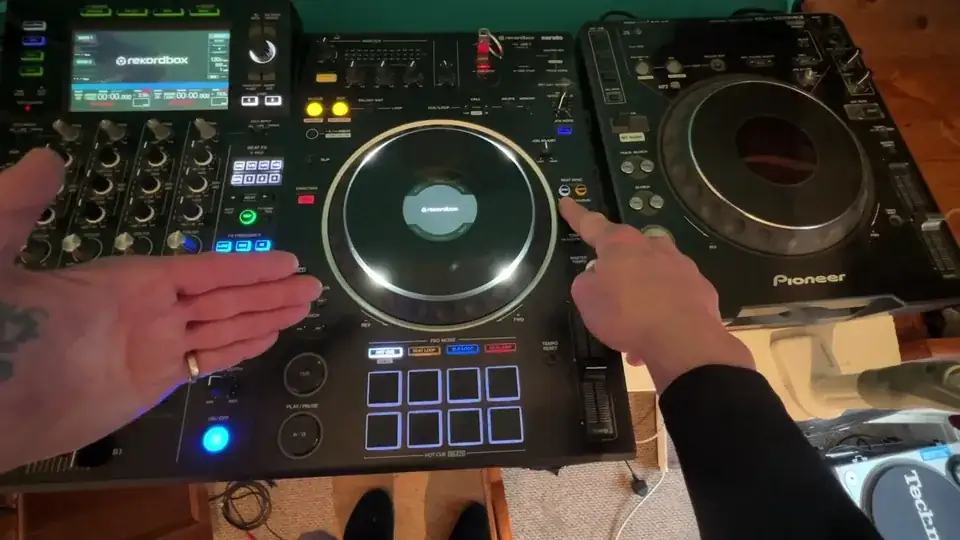
The platter - the circle that looks like a turntable. What it does depends on which mode the deck is in, which is a lesson of its own later.
Performance pads along the bottom, for cue points, loops and effects.
The pitch fader down the side, to speed the track up or slow it down.
Cue and play. Track select to move through your library while something is playing. Search to move within a track. Reverse. Loop. And sync, which will match two tracks' tempos for you - he calls it the magical button, and the rest of the curriculum is about why you should learn to do it yourself first.
The mixer side
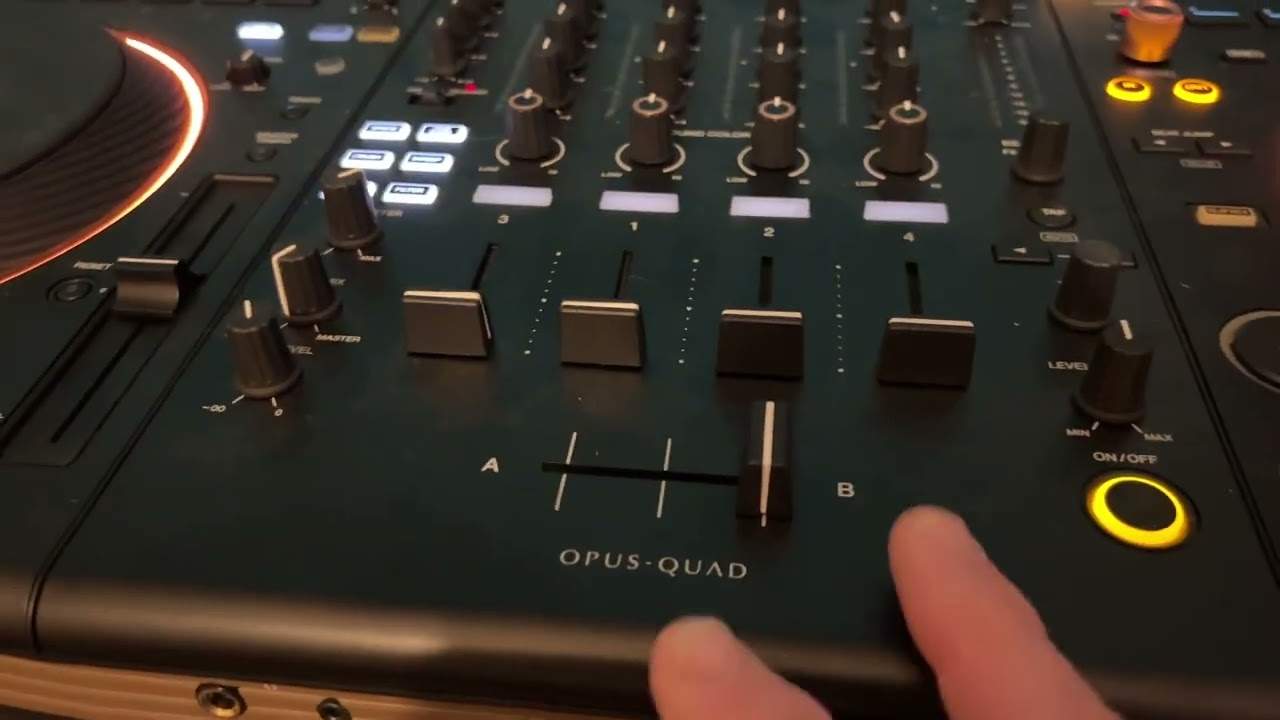
Two channel faders, the volume for each deck. A crossfader between them.
Per channel: trim, which sets how much signal arrives - fully down and you hear nothing at all - and then low, mid and high. His shorthand for those is the one to remember: low is the bass, mid is the vocals and the melody, high is the hand claps and the sparkle.
Then the effects section, the master volume, and the screen.
The thing that makes it modern
The detail worth noticing is the USB socket. A stick of music plugged into the front and the unit is a complete, standalone DJ setup - no laptop, no software, nothing else in the signal path.
That is a relatively recent luxury, and it takes the laptop - a common point of failure in a modern booth - out of the chain.
Contents of the video
0:01 First of all, my disclaimer for people who've been watching my videos
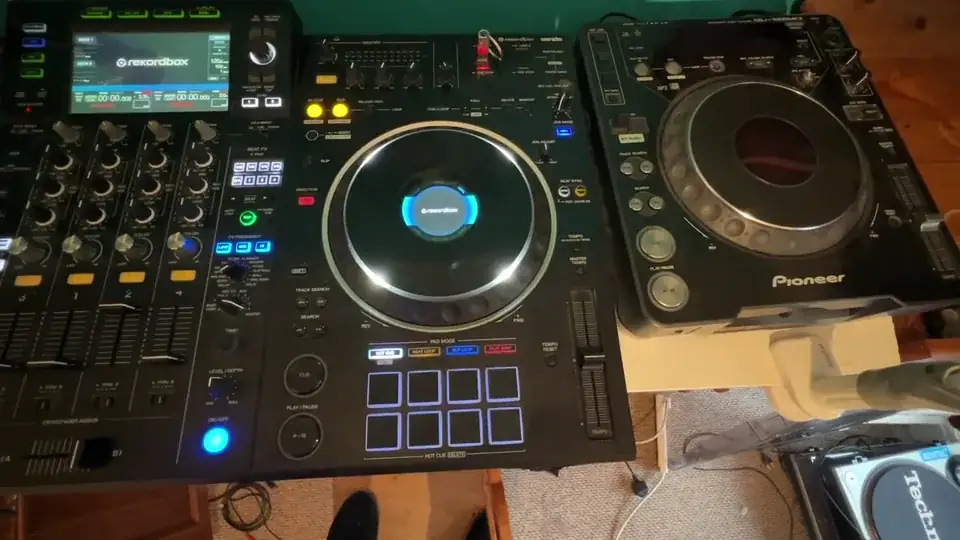
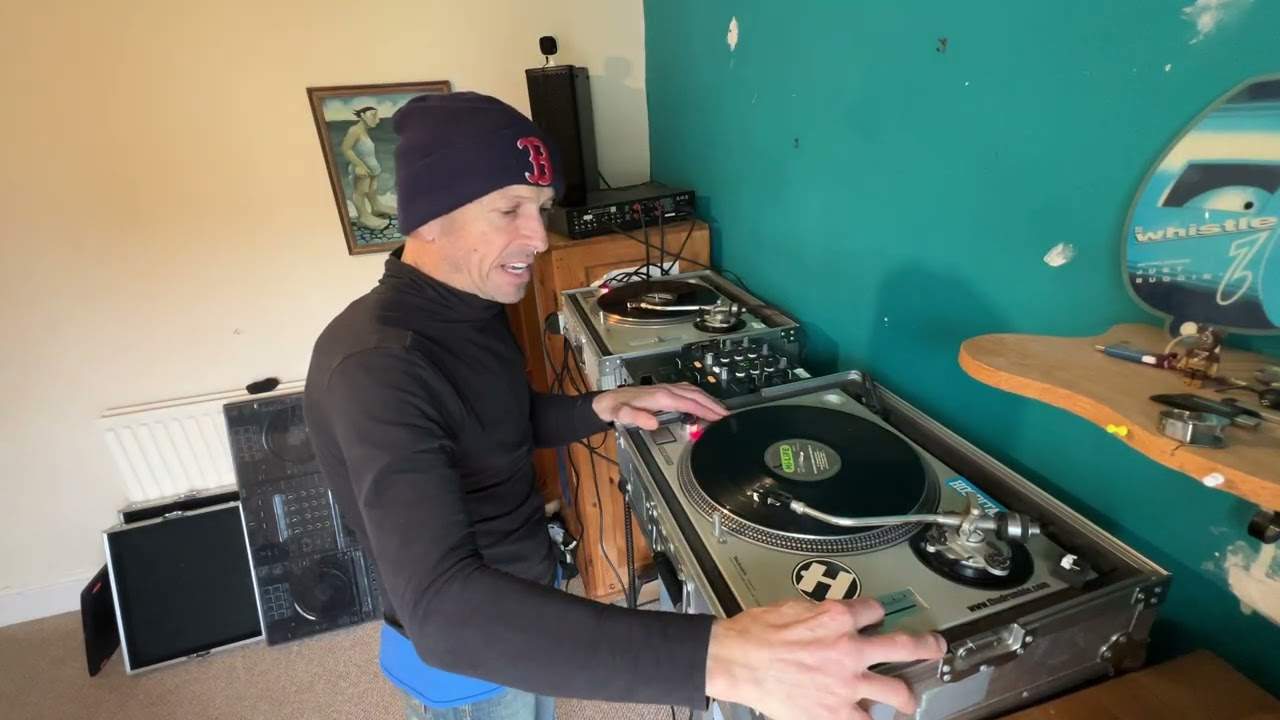
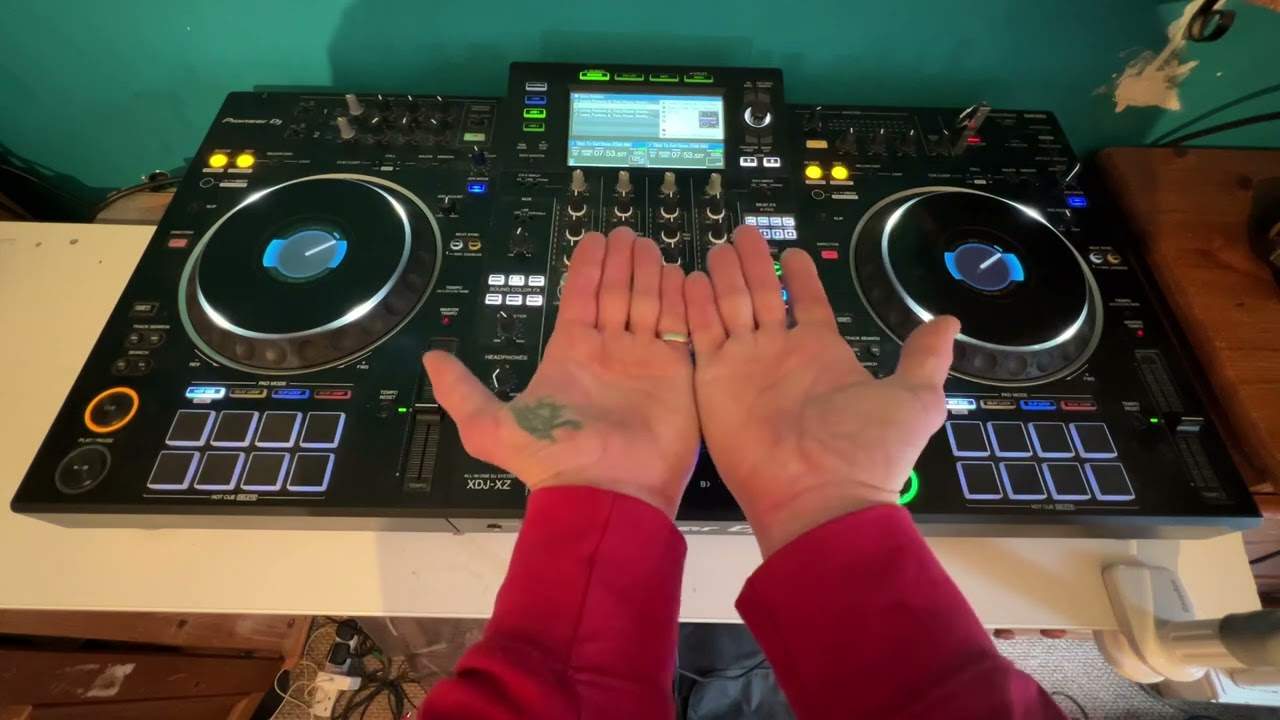
Right, ladies and gentlemen, first of all, my disclaimer for people who've been watching my videos anyway. I've been asked to do some very simple step-by-step beginner, complete novice beginner video lessons and put them in some kind of order, which I'm going to do. So this is sort of video number one. So if you are a prevalent DJ or you know what you're doing, then there's absolutely no point you're watching this video because this is going to be complete and utter basics right down to what parts of the controller are. So thank you for taking part in the Ellaskins demos, tutorials and whatnot. But these videos now are completely for absolute beginners. Thank you very much. So this is video number one. So if you are indeed a new DJ, you know, you've literally just got your controller, you've opened the box, you have no idea what anything does, then potentially these videos are for you. So my name's Jonathan Ellaskins, the DJ tutor, and we have in front of us a controller. This is from Pioneer DJ. It's the XDJ-XZ. To the right of that, we have what's known as a CDJ. It's an actual CD player.
Very similar in footprint. The only difference being is that we'll actually a couple, but the major one is the CDJ-1000M3 will utilize CDs, whereas the controller you have directly in front of you will not utilize it won't work with CDs, but it will work with USB, computer, laptop and so on.
1:51 Familiar with a vinyl turntable, we have this circle here
It will work with a CD player, but you have to plug the CD player into the controller. So you can't play CDs on this. It hasn't got a CD docking area, but you can indeed plug in an external CD player or for that matter, a vinyl turntable into this controller. Okay, so what do we have now?
3:13 These are our up faders, also known as volume controls
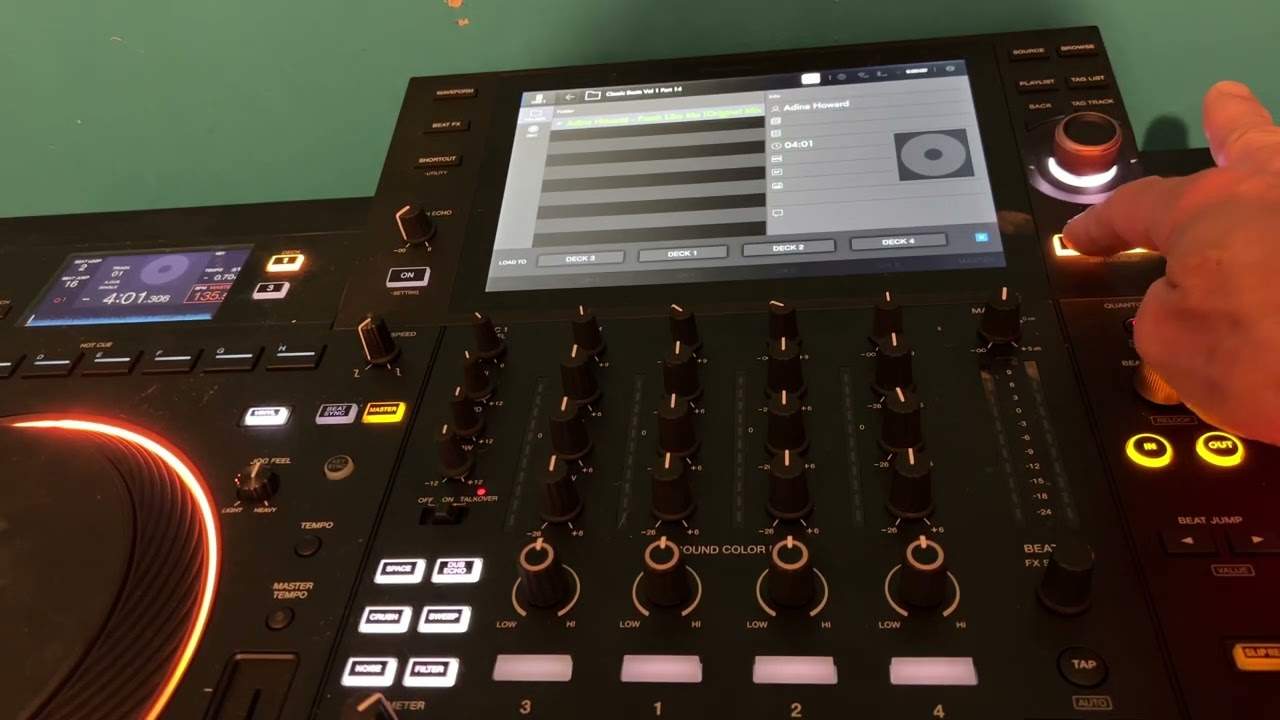
Familiar with a vinyl turntable, we have this circle here. It's known as the platter, and this will let you move the music depending on what mode you're in, but we will cover that in a future video. We have pads down here that we can set cues and we can do loops and all kinds of magical things. Here we have this that will let us slow the track down and speed it up. We have a cue button to cue the track. We have a button here to play the track. We can select through our tracks so we can jump from track one, two, three, four, five while a track's playing below. We can search through that track. We can reverse the track. We can form a loop. We can sync the track so we don't have to rely on our ears to try and work out the BPM.
We can press that magical button, and it will indeed sync two tracks for us. Over here we have the mixer area, and because this is a two-channel mixer, we only get to use two of the channels unless, of course, we incorporate an external CD player, and then we can use three if we've got one or four if we've got two external sources. So these are our up faders, also known as volume controls. We have here a crossfade, and that has a similar function that we'll go over in a future video. We have our dials for effects. We have a low, which is a bass sound. Mid, which is like more the vocals, the melody. And high, which is more the really high-pitched sound, the hand clap. Here we have trim. Basically what that does is that will increase or decrease the volume of that designated channel.
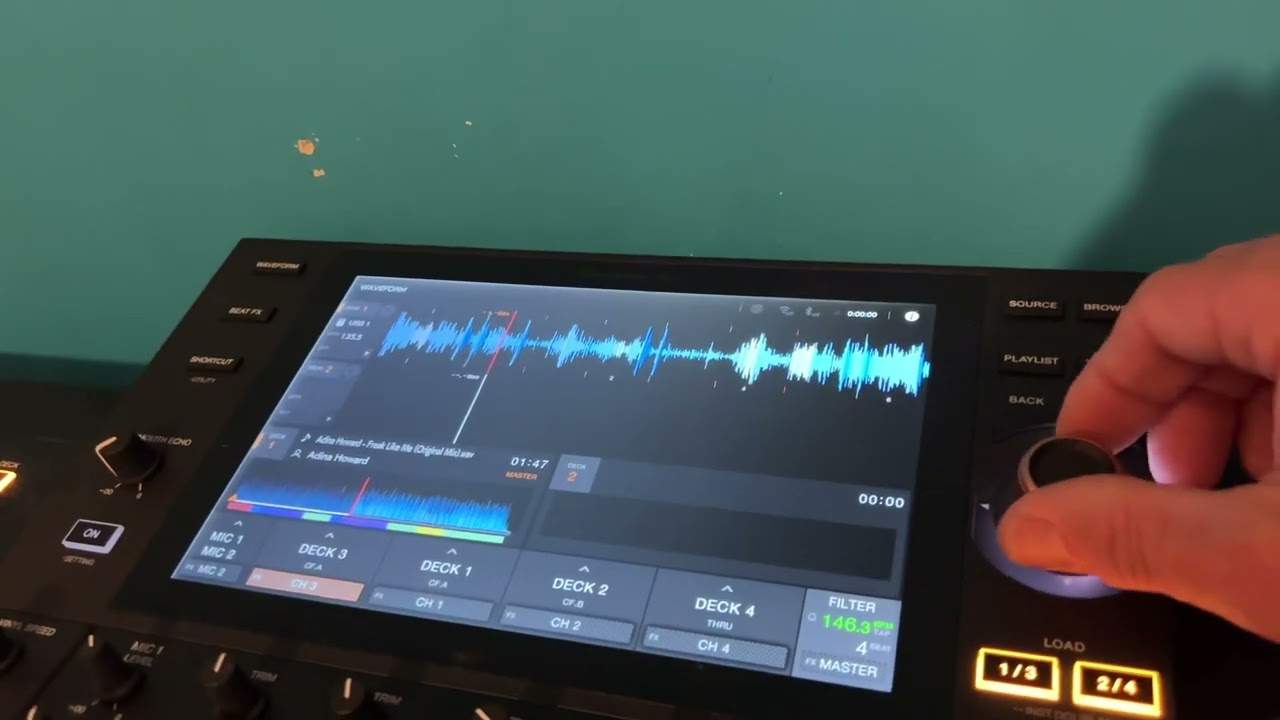
So, for example, with the trim all the way down, you won't hear anything. With the trim up, you're going to start to hear audio. Over here we have a master volume. We have our effects panel here. And we have our screen where we can get all the information we need from the tunes we're playing, etc. The beauty about this controller is that there's no need to use a laptop. You can see I've got a USB, also known as a USB cable. There's a thumb drive plugged in there. That's good to go. But anyway, basically this is sort of an introductory video really. Showing you parts of the controller. Really the main parts you'll need to get used to, to begin with. In future videos we'll be talking more in depth about what DJing is all about.
So this is video number one again for the absolute complete total and utter novice. Thank you for watching. I hope you enjoyed this and enjoy.
This transcript was produced automatically from the audio of the video and may contain mistakes.
This video is part of
Related videos
-
Complete Beginner DJ Lessons Tags Key BPM Etc
A more advanced lesson folded in early, and worth doing once rather than putting off, because everything it sets up gets used for years…
-
Complete Beginner DJ Mixing Lessons Video 19 Getting Your Kit Ready for an Easy Mix
A whole lesson on getting ready, which is the right call - the exercise in the next video only teaches anything if the two decks are…