 20:32
Keeping a turntable in good order
On YouTube this video is called Maintaining a Vinyl Turntable How to Keep It Clean and Working in Tip Top Condition
What this lesson teaches
The longest lesson in this stage and the most practically valuable. His own disclaimer stands: this is how he maintains his own turntables, it is information rather than instruction, and if you damage yours it is on you.
Before anything
Unplug it from the mains. Paramount, in his words, or you end up with curly hair.
A turntable needs no power to make sound
He proves it: unplugged, no lights, needle on the record, and he turns the platter by hand. Sound comes out.
Because the stylus vibrating in the groove generates the signal, which travels through the cables into the mixer, which amplifies it. The turntable's electricity drives the motor, not the sound.
Worth understanding, because it tells you which faults are electrical and which are mechanical.
The parts, named
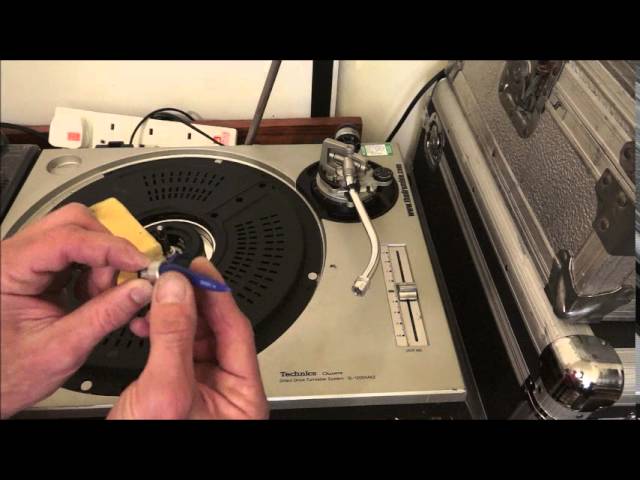
Slip mat - the thin felt layer that lets the record move freely while the platter turns underneath.
Platter - with two holes in it, for two reasons:
- To get your fingers in and lift it off.
- To line one hole up at the 9 o'clock position, which gives access to the voltage selector underneath - the 110/240 switch covered in its own lesson, and the one you leave alone unless you are taking the deck abroad.
If the platter will not come off, tap the top gently with something wooden - a wooden spoon, a rolling pin - and it will ease free.
Under the plastic cover
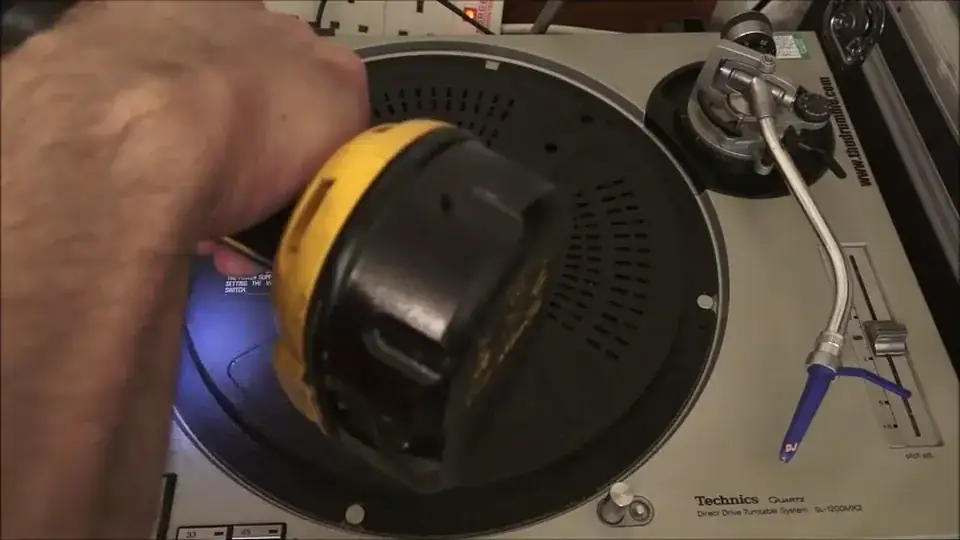
Five screws, and he does this about once a year.
What you find is dust, grit and grime collected around the edge. The reason it matters: there is only a millimetre or two between that cover and the underside of the platter, so accumulated dirt ends up scraping against a spinning platter.
Wipe it out. No pulling apart, no unplugging, no prodding the electronics - just removing what has gathered.
The screws going back
A small point he calls very valid, and he is right: do not cross-thread them.
A cross-threaded screw sits proud of a surface that is supposed to be flat, and a proud screw in there has a millimetre of clearance to the platter. That is a scraping noise and a worn platter.
Direct drive, and why Technics won
The genuinely interesting aside.
In a conventional motor everything is in one piece. In a direct drive turntable the platter is half the motor - which is why, with the platter off, powering up and pressing start does nothing at all.
Technics pioneered the design and patented parts of it, and the engineering is a large part of why these decks became the industry standard. Other makers built direct-drive turntables too - Denon, Pioneer, JVC and Sony among them - so it was never an exclusive, but the SL-1200 is the one that stuck.
If you do not want to open it
Fair enough, and there is a lot you can do without.
Cotton buds, very slightly damp, around the platter edge and - particularly - around the arm housing, which is full of small crevices that collect dirt. He demonstrates how filthy a bud comes out of a deck that looked clean from two feet away.
His summary, which is the whole philosophy of the lesson: where there is crap, give it a clean.
The counterweight, and a myth killed
The thing he gets properly annoyed about.
Some people throw away the supplied parts, turn the counterweight round and load as much weight as possible onto the cartridge - up to taping a coin on - believing it stops the needle jumping.
You are very wrong. Set the arm weight correctly and three things follow: better sound, vinyl that lasts far longer, and a needle that does not jump.
The skipping is cured by correct setup, not by force. Excess tracking weight grinds the stylus into the groove and destroys the record while barely helping.
And on the cartridge he shows - a Concorde type, named for the shape - there is no need for any added weight at all.
Diagnosing a dead or intermittent channel
The most useful sequence in the lesson, in order, each step ruling something out.
1. Is it the mixer? Unplug whatever is in that channel and plug in a different source. If the new source plays both sides, the mixer is fine.
2. Does the fault follow the cable? Swap the turntable's left and right RCA plugs at the mixer. If the dead side moves with them, the fault is in the cable or the turntable. If it stays on the same side of the room, it is downstream.
3. Clean the head-shell pins. Unlock the collar just above where the head shell plugs in - turn it clockwise - and the head shell comes off. There are four small pins, meeting four spring-loaded contacts inside the arm. Dirt there is a classic cause of an intermittent channel.
Blow the socket out, clean inside with a cotton bud, and give the pins a gentle rub - his method is on his jeans, which works, and a lint-free cloth works better.
4. If it is still intermittent, it is the cable. Which it eventually will be, because that is the nature of turntables.
Replacing the phono plugs
If you do it yourself:
Cut both, not one. Cut one and leave the other and you end up with unequal lengths, which looks wrong and behaves worse.
Use brand-new plugs. Not the old ones - the fault may be in them.
Cut three or four inches down from the existing plug, not right next to it, because the problem may be in the stretch between the plug and where the lead emerges.
And if that does not fix it, it is internal - at which point this video stops and a professional starts.
Do not lock the arm down with the lever up
A damage warning. You lift the arm with the cue lever, swing it over to the rest, and then clip the retaining clip over it - with the lever still raised.
Don't. That puts load on the lift mechanism and the part of the arm connected to it. Put the lever down first, then clip.
Arm height
There is a rotating collar around the arm housing. With the lock pointing towards the counterweight it is free: clockwise raises the whole housing, anti-clockwise lowers it.
It exists so you can set the arm height to the thickness of your mat - the thin felt slip mat, or the thicker rubber mat Technics supplied. Check the figures for whichever you use rather than guessing.
Feedback: loosen the feet
The last tip and the one most likely to solve a problem you have right now.
If you get rumbling feedback as soon as you put the needle down and bring the volume up, it may be the feet screwed in too tight.
Screw them anti-clockwise - his setting is about halfway out, loose but nowhere near falling out - on all four.
The mechanism: the feet are the turntable's suspension. Screwed hard in, they transmit the bass coming out of the speakers straight into the plinth, up the arm and into the cartridge, which amplifies it, which produces more bass. Loosened, they isolate.
His claim is that doing this to all the feet will eliminate some if not all of the feedback, and it is the right first thing to try before moving any furniture.
Contents of the video
0:00 How I maintain my vinyl turntables

Alright guys, Jonathan aka Ellaskins the DJ Tutor here and in this video I'm going to show you, help you should I say, how to maintain and look after your vinyl turntable. Just a bit of a disclaimer here, nothing in this video is given as legal evidence, it's provided for information purposes only. So in other words, I'm going to show you how I maintain my vinyl turntables by all means follow these step-by-step instructions but if you do on the very slightest chance somehow damage your turntable then I am not held responsible because this video is for demonstration purposes. It's there for information and it's not legal in any way. So here in front of you we have a Technics SL1200 Mark II turntable. Before we proceed in any way, shape or form make sure your turntable is unplugged from the mains. That is paramount otherwise you'll end up having curly hair.
Alright, so I'm going to put a piece of vinyl on there. Just to prove a point as well a few people have been saying that you need the turntable plugged in before it will play. Well you don't. As you can see the light isn't turning on, nothing's happening, there is no power coming to this turntable. I'm going to put the needle on the record. I'm now going to move the record with my finger and we can hear that we're getting sound. I'm not going to go into great detail because I don't know the exact physics behind what goes on but what is happening in a nutshell is that the needle is vibrating in the groove. That vibration is then transmitted all the way through the cables into the mixer which of course then amplifies that sound and then puts that sound into your amplifier in turn into your non-powered speakers, your passive speakers. Alternatively from your mixer into your active speakers with an active speaker.
Amplifier inside therefore of course it's giving you sound so that's that part now then turntable there we go and you'll notice I've got this floppy kind of thing that is just it's like a piece of thin material really that's known as the slip mat that will help the piece of vinyl move freely while the platter is moving underneath so there you go there is your slip mat this here is known as the platter now you'll notice on this turntable there were two holes. Now there are two reasons one reason is if you move that around the platter round at some point in fact I tell you what let's change the lens on the camera and we'll have a closer look one second. Oh two holes there for two main reasons one is to remove the platter and the
Other one is so you can set one of the holes just above this area here it's at 9 o'clock on the turntable and that will let you set the power input so in the United Kingdom for example the power here is 240 volts in the likes of America it's 110 so what you can do is get a small screwdriver and turn that accordingly to the power supply for your country but be very wary if you buy a brand new turntable from the country where you live it will be set according to the country you live in. So there is no need to fiddle with that whatsoever the other reason as I said earlier for these two is just to lift the platter off like that and what I'll do I'll just grab my fingers their thumbs pull and push down with your
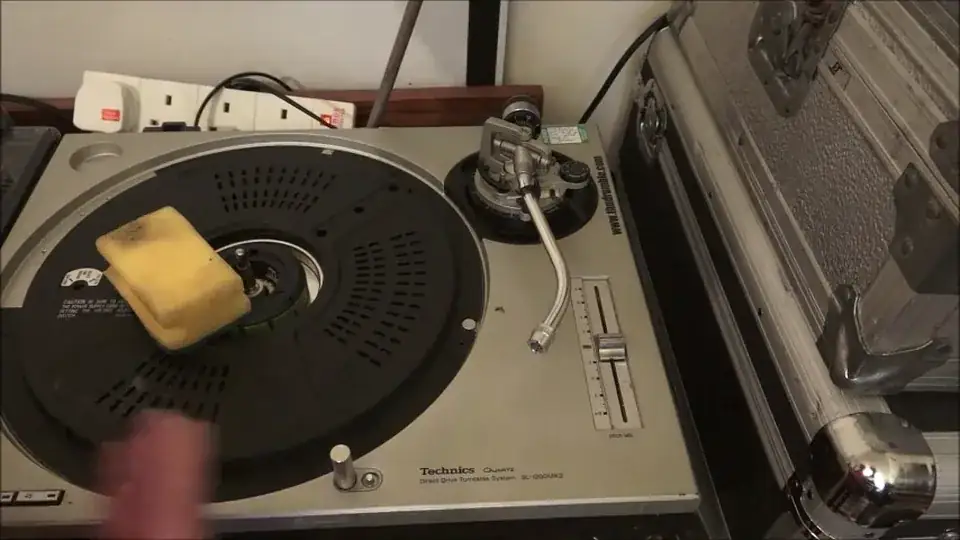
Other fingers if for some reason it doesn't pull off what I've done in the past is I've just got some wooden spoon or a rolling pin tap the top of that and just very gently and that will help to ease the platter off so there you go right once you've taken the platter off then you'll come to this plastic covering which is covering over believe it or not all of the electronics underneath now there are one two three four five screws to remove now again I don't say you I'm not saying you have got to do this but this is what I will do maybe once every year or so I will remove this and there is a good reason for that which you should be able to see I did clean a little bit earlier on but if you can see on that sponge is a bit of dirt there what will
Happen not might what will happen is you will get a lot of dust collecting all the way around the side here and what I like to do is just give it a wipe and get rid of all that CRAP so we're just gonna get rid of that and there is good reason for this it's because over time you get a lot of dust grit and grime in there now there is a few millimeters if a millimeter in between this plastic covering and the platter itself and the last thing you want is just dirt and residue to get collecting inside here and then of course that is then scraping on the underside of the platter so it's always a good idea to give it a clean it's like anything you take your car out once in a while give it a scrub hopefully you should
It's pretty much exactly the same with anything you look after it and it will look after you what I'm going to do now is just give this a clean as well this is called just maintenance it's looking after the items that you've got now during the course of this video we are not going to be pulling anything apart we're not going to be unplugging cables wires this is general maintenance
With a bit of common sense now here you see there's a tiny bit of dust in here so get rid of that of course just make sure that you don't start tapping the wires too much pushing or prodding or poking any of the electronics inside the turntable so this here is half of the direct drive motor now I don't know the exact ins and outs but what happened is when Technics designed this direct drive motor I believe they had a patent on it for at least 20 years which meant that no one could copy this direct drive motor which meant in the industry they were the leaders and that is why Technics were just renowned for being the best turntable around the world because no one could copy this direct drive motor what I can show you though is to
The right hand side here you can see these cables leading under to the sort of the side where the arm is now that these cables here will go directly to the pitch now I don't want to start unplugging that as I said I don't want to go too far because to get to the pitch control you've got to turn the turntable over you've got to pull all the arming of the weight and goodness knows what off the arm undo half a million screws to get to the pitch but I will find a video I did quite a few years ago on changing the pitch control as well okay so we've done that I'm now going to replace the plastic cover I'm also going to try and find one here one of the screws and i'm going to put this in now again just a small point but very valid
8:00 Conventional motor that you know it's
I'm going to use my electric screwdriver because I've done this many times before but it is so important now that you make sure when you screw the screws back in that you don't miss thread now I've done this many times before if you do miss thread and the screw is say slightly proud of a flat surface then it could potentially rub against the base of the platter and that's what you don't want to happen now as i said earlier there is only a tiny amount of space in between here and there now if you look at a conventional motor that you know it's all in one piece but the direct drive is two pieces the platter itself is half of the motor so of course you put that on there and that will start to turn if you actually turn
The turntable on powered up and turn it on without the platter on nothing's going to happen because you've only got one half of the motor so that is the other half that is the genius part about direct drive turntables so just going to fit that on let's imagine that you don't want to take this off and you're a little bit reluctant to pull apart your highly prized turntable now I don't I don't blame you you don't have to now there are these things in the UK cotton wool buds you can poke your eyes out stick them up your bum do whatever you want to do really what you can do is just damp the end of these and then just go around the edges and you'll find that these are fantastic at just picking up the bits of rubbish and dirt I mean
Just by having a quick mess around here I don't know if you can see there but that one is quite dirty now I'm going to keep hold of these at the moment because these are fantastic for cleaning around the arm housing here we go so I've just damped the ends here and again it's just a question of just going around and getting into all those little tiny nooks and crevices and giving it a good old clean like so there now that will clean up quite nicely there I mean I shouldn't really have to explain much here where there's crap give it a clean clean the crap wait at the back of your turntable some people seem to think that as soon as you buy a turntable you've got to throw away all the bits and turn that the other way around and give it as much weight as possible and stick about
50p on the end of year your styli so it's grinding into your vinyl well you don't have to alright you do not have to at all alright let me just get the camera set up a little bit like that okay
So what I'm going to do is make sure that the weight is on correctly and if you follow simple instructions which I'm not going to say in this video this video is about cleaning the turntable not about setting the arm or the weight but if you follow very simple instructions you may find that you don't even have to put the weight all the way to the front you can have it back quite a bit if you set the weight of the tone arm correctly then a you'll get a better sound and be just as important your vinyl will last a lot longer and alright that's how to see as well the needle won't jump so if you think that by having the weight turned around and wait on the the end of this the needle is styli and it'll stop your needle from jumping you are very wrong
It's about setting up the arm correctly first in that split second I cleaned it and look at those again from I don't know a couple of couple of foot it looked relatively clean but the closer one gone the closer you get the more you realize that there's lots of dirt in there now it's not going to damage it that much but it's about just keeping things clean okay so let's have a look at the needle or the styli itself now this is known as a concord needle simply because it looks like Concorde bless its heart even though it's a little bit more expensive than it looks like Concorde bless its heart even though it's a little bit more expensive than it doesn't fly anymore there you go but there are different types now of course
12:50 Plug turntable, unplug, appear disappear
It doesn't fly anymore there you go but there are different types now of course this one here there's pretty much no need to put any kind of weight on the front but as I said earlier there shouldn't be any need to put any weight on that anyway now then again video about maintenance now do you ever find that sometimes when you plug your turntable in you don't seem to get any sound out of the left or right speaker and it's intermittent it'll like appear disappear appear disappear you have checked the mixer the mix is working fine of course if you think it's the mixer very simple all you need to do is unplug whatever source is into that channel plug in a new source and if that source works perfectly left and right and then you put the turntable back in
And it's still only working on the left hand side of the right hand side it could be one of two things one is that the RCA cable from the turntable has some form of fault in it so if you've got a little bit of a problem with that you can get rid of it so let's say for example now the right-hand speaker isn't working all you do is you unplug the RCA from the back of the speed the mixer sorry and switch them around once you've switched them around if now the left side isn't working then potentially still possibly wait a minute could be that cable but what you need to do then is follow this instruction just bear that in mind unplug the styli and you plug in your turntable and you plug in your turntable and you can do that very simply by unscrew just screwing or moving this
Part of the you've got the arm here I'm just above where the styli plugs in you've got a small area there just move that clockwise and that will let the styli unplug now then what you need to do is you can see just about see on there we've got four small pins now they are the connections to other four pins inside the arm and the ones in the arm are on tiny springs and they sort of push in very slightly now over time you could get a bit of dirt inside there so you could have a tiny bit of dirt that's stopping the connection now what I've done in the past I've taken this and I've just rubbed it on my jeans try and get me knee up there and just give it a gentle rub on your jeans and then plug that back in
15:25 Something, lock mechanism, entire housing
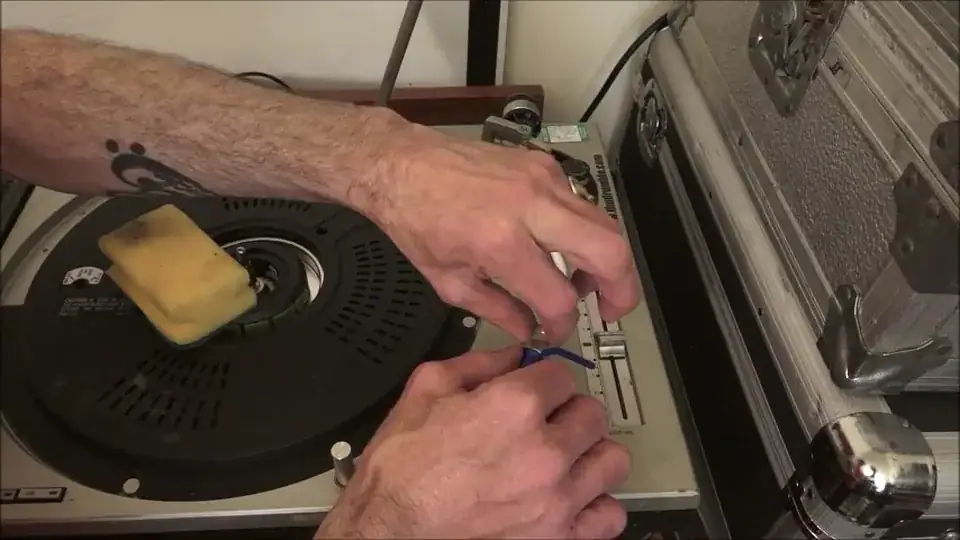
Prior to doing that just blow inside there give it a quick blow nothing like a good and then what I'm going to do as well we won't go there is I'm going to get the cotton wool bud again and I'm just going to gently give that a clean inside there that's it I'm now gonna put that back in right now then let's relate back to what I said earlier about your RCA cables let's say now all of a sudden they're working perfectly that was the problem because the connection inside here if you still have that issue then it will be the RCA cable now over time they will start to something will go wrong it's it's the nature of the beast with turntables all turntables something eventually will go wrong so let me just pull that out there are the cables now again this video is
About explaining maintenance do it if you want to but I'm not going to go into but if you're a bit too scared then get a professional to do it I have in the past I've just snipped both of them off what I haven't done is if one starts going a bit dodgy snip one left the other because you end up getting one longer than the other it just doesn't look good so you snip them both off get two brand new plugs brand-new don't use the ones you've got because there could be something wrong with them don't snip right next to that they're plugged in the plug itself because there could be an issue in between the plug and where the black lead comes out so I would recommend maybe you cut sort of three or four inches down and then replace with brand new RCA cables and I guarantee you
It'll start to work all right if it doesn't then it's more of an internal problem and as I said earlier I don't want to start pulling this turntable apart so this video is not about pulling everything apart it's about just general maintenance that's pretty much it really something I'd just like to show you as well just so you don't fall into the trap of potentially breaking some part of the arm or the housing is this is of course to lift the arm now I've seen this happen in the past and it's not advisable okay you unhook the tone arm of course you're playing away happily play away or let's say you're playing the record and then you lift the arm that will in turn lift the tone arm and then you place that back on to the rest now
18:32 Rubber, turn clockwise, skype lessons
Some people then we'll hook that on like that with this up make sure that's down because what you're doing is you're putting too much pressure on the arm you've got a lock mechanism here now when the arm of that lock mechanism is pointing towards the weight that will let you move the entire arm housing up or down up is moving this entire we've got around the arm housing itself there's almost like this circular piece of plastic moving that clockwise will increase the height of the arm housing anti-clockwise will decrease and that really is there for let's say for example if you've got the rubber it's like a right so I can't even call it a slip mat it's a rubber mat that will go on the platter itself the rubber mat should come with every single brand new Technics turntable now
Of course this here is so you can set the height according to the slip mat or the rubber mat that you've got but again check more instructions on the height that you need your turntable with reference to whichever slip mat you've got really and lastly if you're having issues with feedback you find that every time you stick a piece of vinyl on put the needle on the record you start to turn it up you get lots of that rumbling feedback it could be it might be because the feet aren't set correctly anything can feet how can you set those correctly well by screwing them in you can screen quite tight and clockwise you screw them in anti-clockwise you screw them out it could be because they're in too tight now just try this just turn them a little bit now I turn
Them pretty much sort of halfway half the amount that they can turn before they fall out so you can see that foot now is relatively loose sorry it was at the camera there just turn that clockwise let me just zoom out a little bit that's better right turn that clockwise now and that's in tight now that if I move it anti-clockwise three or four turns then the foot isn't falling out but it's a lot looser but I guarantee you if you do that with all the feet you will eliminate some if not all of the feedback alright hope that's been a help check out the link in the description and don't forget if you're interested I also do one to one Skype lessons so where I'll finish off with practice and enjoy inform the Skype lessons is in the
Description thank you very much
This transcript was produced automatically from the audio of the video and may contain mistakes.