 9:13
BEGINNER DJ MIXING LESSON ON BEAT MATCHING by ellaskins the DJ Tutor
Contents of the video
0:00 Very basic mixing lesson here
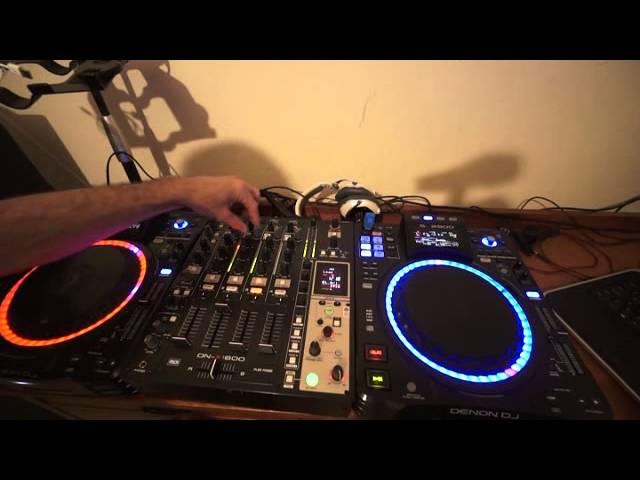
Alright ladies and gentlemen, very basic mixing lesson here. Being asked to do loads more because there's a lot of people out there who still can't grasp it. So this one hopefully will help you. Track I'm playing by the way is by Charlie. It's the track entitled Sent Under. It's the original mix. Go and check out the SoundCloud mix and go and check out the other tracks he's got. He's a young producer and I can see this guy going places. If you like soulful house music with a nice underground grimy sort of bass line with a bit of soul attached to that as well, if you like a bit of jacking house, go and check this guy out. The kit I'm using by the way is from Denon. The mixer in front of you is MIDI compatible. It's the DN-X1600. To the right and left we have CD players from Denon which are the SC2900s. They're both linked together so whatever I'm using on the right hand side I can use on the left hand side.
Okay, so what I want to do first of all is I want to form a loop and I can do that by using the effects area of the mixer which is at the right hand side. You can see loop there on the screen but just to show you how to get to the loop feature we need to turn the EFX select dial. Okay, so I'm moving that now and as soon as I get to loop I'm going to press down. There it is. Hold on. Missed it. There it is. I'm going to press down. Now the loop is engaged. Just below the screen we have the wording EFX and then below that we have beat. Either side of beat we've got two buttons. If I press the one on the right it will increase the loop that I want to get. If I press the one on the left it will decrease it so for example we can have anything from a sixteenth of a beat up to two bars which is eight over one. Four over one is one bar.
Two over one is half a bar. One over one is one beat. For this demonstration I'm going to go to eight over one which is two bars. Okay, I've set the dial bottom right hand corner to wet. I'm now going to press the on off button with the volume up on that channel. I'm going to press this button on the count of one. Three, four, one, two, three, four, one, two, three, four. Now have a listen and see what happens. Bring the volume down.
2:28 I've recorded a loop on that channel
I've recorded a loop on that channel. Volume's down. You can see that's it. Track stopped. I can physically stop the track now but the loop will carry on playing. So on the other side, once you form the loop by the way as well, you can't turn it down even if you turn down the volume here on the channel. That's a good effect actually. But we're not going to do that right now. Sorry. Jonathan concentrate. Okay. On the left hand side we have exactly the same track. Let's just turn the volume down a second. Okay. So let's imagine that I've recorded that loop with the pitch on the right hand side at the centre point. I have the same track on the left hand side at the centre point. I then bring in the left hand track on the count of one. Perfect timing with the loop. Well of course it's going to beat match isn't it? But we don't want that. We want to try and make it difficult for ourselves. The whole idea of this demonstration is to make it difficult for ourselves.
The whole idea of this demonstration is so you practice. So volume up there. Sorry. Volume up there. I turn the master down. What I'm going to do is I'm going to move the pitch slightly away from me. Now a good way of doing this as well is if you cover the screens to begin with so you can't see the original BPM. So what you're doing is you're making it difficult for yourself. Also there's no need for headphones. Also there's no need to have a booming loud volume sound. Have it audible level. That's all you need. Right. I've moved the pitch down. I'm now going to press play in time on the count of one. Let's have a listen and see what it sounds like. Three, four. Okay we can hear that sound was really terrible. It went off. What I want to do now is I'm going to move the pitch further away from me. Now what I'm listening for is the difference in time between the beats going off. Are they going off quicker?
4:41 Let's move that down again even further
Or are they going off shorter? In other words is it taking more time for them to go off or less time for them to go off? Let's have a listen. Now what do you think? Let's move that down again even further. Press play. So when I say move down I'm moving it away from me. Let's press play. That's pretty bad isn't it? I'm now going to bring it towards me but I'm going to bring it above the zero position. It's still off. What we're listening for is the time difference between the beats going off and the time difference between the beats going off. In between the kicks. I'm going to put the pitch now right about the centre position. Let's have a listen. Okay it was still off but they did seem to stay together roughly at the same time for more time. I'm going to move the pitch down slightly. Now they stayed together a lot better there. Now something also that you need to take into consideration
6:47 You need to make sure that your finger is continually on the pitch
Is when you're forming a loop it's not highly likely but it's possible that the loop itself could be very slightly out. Now here's the key. Even if you do know the exact BPM of the one on the right and you match it with the one on the left because the loop could be slightly out let's say for example an eighth of a beat or even a 32th of a beat. A 16th. Let's call it a 16th. A 16th. Every time that loop does a circuit it's going to be out by another 16th then another one and another one and another one and another one. So even if you get it perfectly in time after two or three loops it will be out of time. So this is what you need to do. You need to make sure that your finger is continually on the pitch. Now there's two things
You can do. One is when it goes off beat very slightly if the loop is out of time pitch it up very slightly bring it back down. Pitch it up bring it back down. Now this may sound ridiculous and may look ridiculous but this is an excellent way of practicing. The other thing you can do is once you've got it in time perfectly for example let's say the pitch needs to be there. The other way is to jog it slightly. So every time it's going around say one loop you're just jogging it very slightly like so or the other way. Again it depends on if it's going too fast or too slow. Now this may seem for a beginner as though it's pointless but as you get into more mixing and as you get into nightclubs mobile and you have to do something like this you will need to do moves like this without even thinking about it. You don't
Have to. I want to say you don't have to. You're not allowed to think about it. It should come naturally. It's exactly the same analogy I will give you as driving a car. If you thought about the amount of moves you needed to do to drive just a normal car you wouldn't be able to do it. For example you get in gear accelerate move maneuver mirror accelerate right foot on the throttle change gear. If you were thinking about all those moves you'd end up crashing so this is the key. It's thinking about what you're doing to begin with and then eventually you won't have to think anymore. Your moves will come naturally. If there are any more thoughts on this video or any more points you'd like to put over maybe in future videos do it. And a big shout out to Charlie for the tune. Go and check it out and SoundCloud practice and enjoy. Thank you.
This transcript was produced automatically from the audio of the video and may contain mistakes.