 3:26
Loops, cue, play/pause and pitch - what they do
On YouTube this video is called Complete Beginner DJ Lessons Loops Cue Play Pause and Pitch What They Do
What this lesson teaches
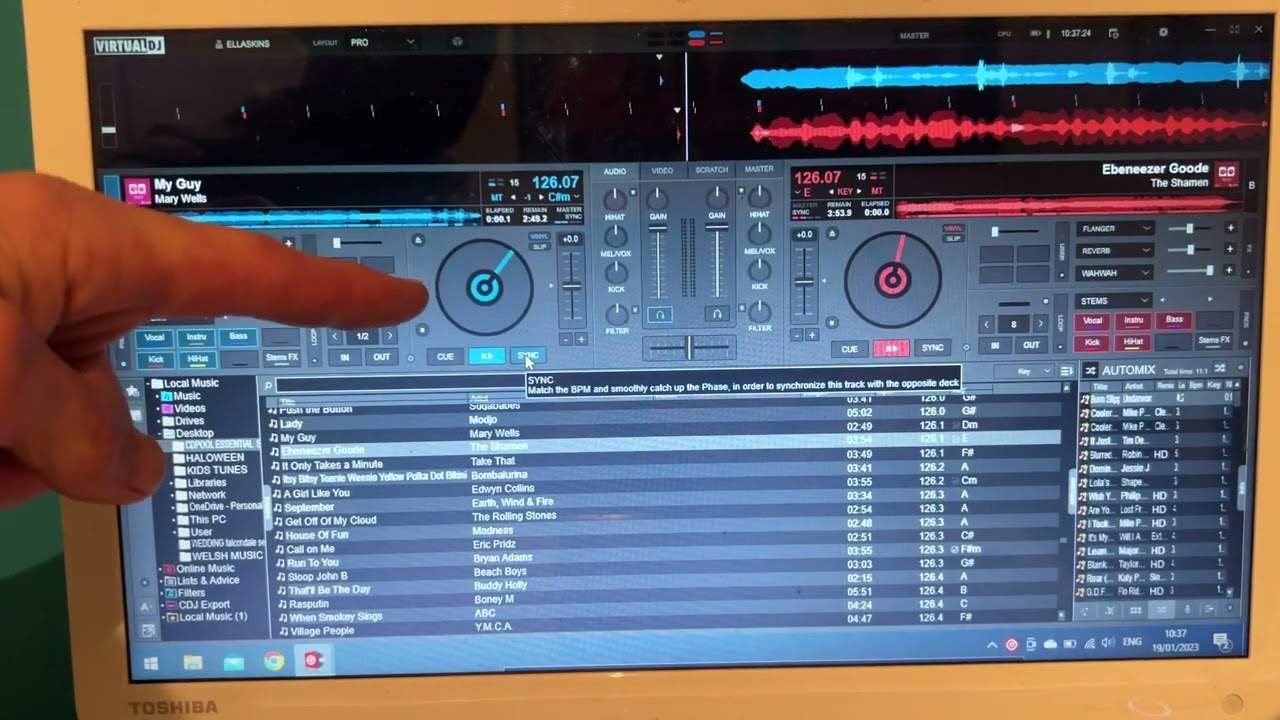
A tour of the software equivalents, and the value is in seeing that nothing new is introduced. Everything here is something you already know, drawn on a screen.
Loops
Two icons, in and out, exactly as on the controller. Press in to start the loop and out to end it.
Beside them is a beat count - his shows 4, which is one bar - with arrows either side.
- The right arrow doubles it: 4 to 8, 8 to 16, 16 to 32, 32 to 64.
- The left arrow halves it: 4 to 2, 2 to 1, down to half a beat and beyond.
That doubling and halving is worth noticing, because it is why loops stay musical. Every length you can reach from a bar by doubling or halving is still a division of the bar, so a loop set this way cannot land on an awkward length.
Play, cue and sync
The play and cue icons behave exactly as the buttons do.
Sync matches the two tempos automatically: hit it on the 122 deck while the other is at 124, and the 122 becomes 124. Hit it on the other side and the opposite happens.
Worth knowing what it is and worth leaving alone while you are learning - the whole of the previous eight lessons is about doing that job yourself, and the machine cannot teach you to hear.
Pitch, faders and crossfader
The pitch control on screen moves the same way the fader does: in his software, up is slower and down is faster, matching the controller's away-from-you and towards-you.
Below are the channel faders - down for off, up for full - and the crossfader moving side to side. Same controls, same behaviour.
The point
If you have followed the series this far, there is nothing to learn here, and that is the lesson. The software is a drawing of your controller, so anything you work out on one transfers directly to the other.
Which also means you can practise without the hardware in front of you.
Contents of the video
0:00 Is very general and will cover
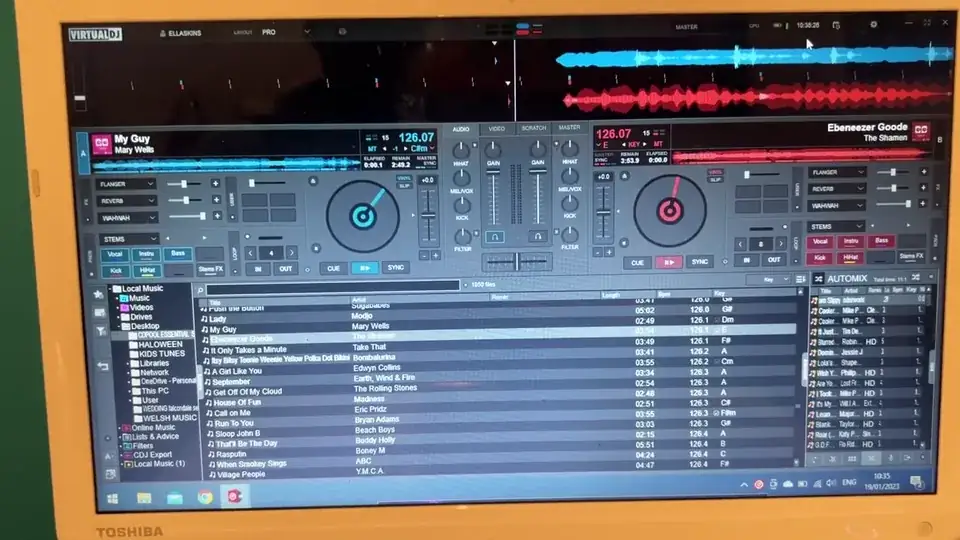
Video number six for the complete and utter beginner. Yes, I'm using the laptop, got the camera directly at the laptop. I'm using VirtualDJ, but what I'm about to explain is very general and will cover practically every single other DJ software program out there. So what we've got here is you should see two icons, one in and out. Now they are there pretty much exactly like on your controller, and they will enable you to form a loop. You press the in to start the loop and out to finish the loop. If you want to also, I've got a number four there, and that signifies to me four beats. So if I want to do a one bar loop, that is four beats. There are arrows next to that facing the right and the left. The ones pointing to the right will extend that twice. So I go from four to eight, eight to 16, 16 to 32, 64 if I want to. If I press the one on the left, that of course will reduce it by half. So I can go back to one bar, half a bar, one beat, half a beat, and so on. Okay, so here you can see an icon flashing at the moment. That's
Because I've got a track already loaded. Now that icon is exactly the same as the play, pause button on your controller. Next to that we have Q. Excuse me, that's exactly the same as your Q button on your controller. To the right here we have sync. Now what that will do if we engage that, that will make the two tracks automatically match up in BPM. So for example, if the track on the is let's say 122 bpm the one on the left is 124 what will happen is if you click on the one that's 124 the one on the right will match the one on the left and go to 124. The opposite applies if you clip the sync on the other side. Okay so next to this circle here which is our virtual turntable we have the pitch. Now again like the pitch on your controller if I move the pitch in one direction
2:19 Again we have sorry again we have exactly the same with the controller
I'm moving it up now which is the equivalent on the controller of moving it away from you I am decreasing the bpm. If I move it down which is the equivalent of moving it towards you I'm going to increase the bpm so exactly the same on a controller. Again we have sorry again we have exactly the same with the controller. We have the gain which are also known as the up faders or sorry not gain the gain is up here sorry I beg your pardon that's the equivalent of the trim but here we have our up faders and I can move those up and down so again down all the way down is off position no volume at all all the way up is full volume exactly the same with the other one and below that we have our crossfade and we can move that from right to left exactly the same as the crossfade
On the controller that we're using. I hope that's a help thank you for watching practice and enjoy
This transcript was produced automatically from the audio of the video and may contain mistakes.